Back home to Wicked Fabrication
2025 marked a big milestone for the Wicked Shoebox—its return to the road and to the show circuit after being tucked away since 2018. One of its stops was the Sacramento Autorama in May. At nearly 400 miles from home, we trailered the car up, only to be greeted by a surprise when unloading: a puddle of hydraulic fluid under the bell housing. A quick press of the clutch pedal confirmed the culprit—a failed release bearing.
Despite the setback, we managed to limp the car into the show, where it still walked away with three awards. But with the bearing needing replacement, I reached out to Craig Wick at Wicked Fabrication to confirm the part. That call quickly turned into an incredible offer: Craig not only fit the repair into his packed schedule but also suggested bringing the Shoebox to the upcoming Wheel Hub Live show in Nebraska alongside another customer’s car. All I had to do was fly in. His generosity made the whole experience seamless, and the show went off perfectly.
From there, Craig and I discussed a list of small improvements to fine-tune the car for regular driving. After the Nebraska show, he took the Shoebox back to Auburn, WA to complete the work. Over the summer, we reunited at the Goodguys show in Puyallup and again at Wicked Fabrication’s open house, where the car was back on familiar ground and drawing plenty of attention. By early September, the updates were finished, and the Shoebox returned home to Southern California—better than ever and ready for more miles.
So, what was done while the car was on summer vacation at Wicked Fabrication? Here we go:
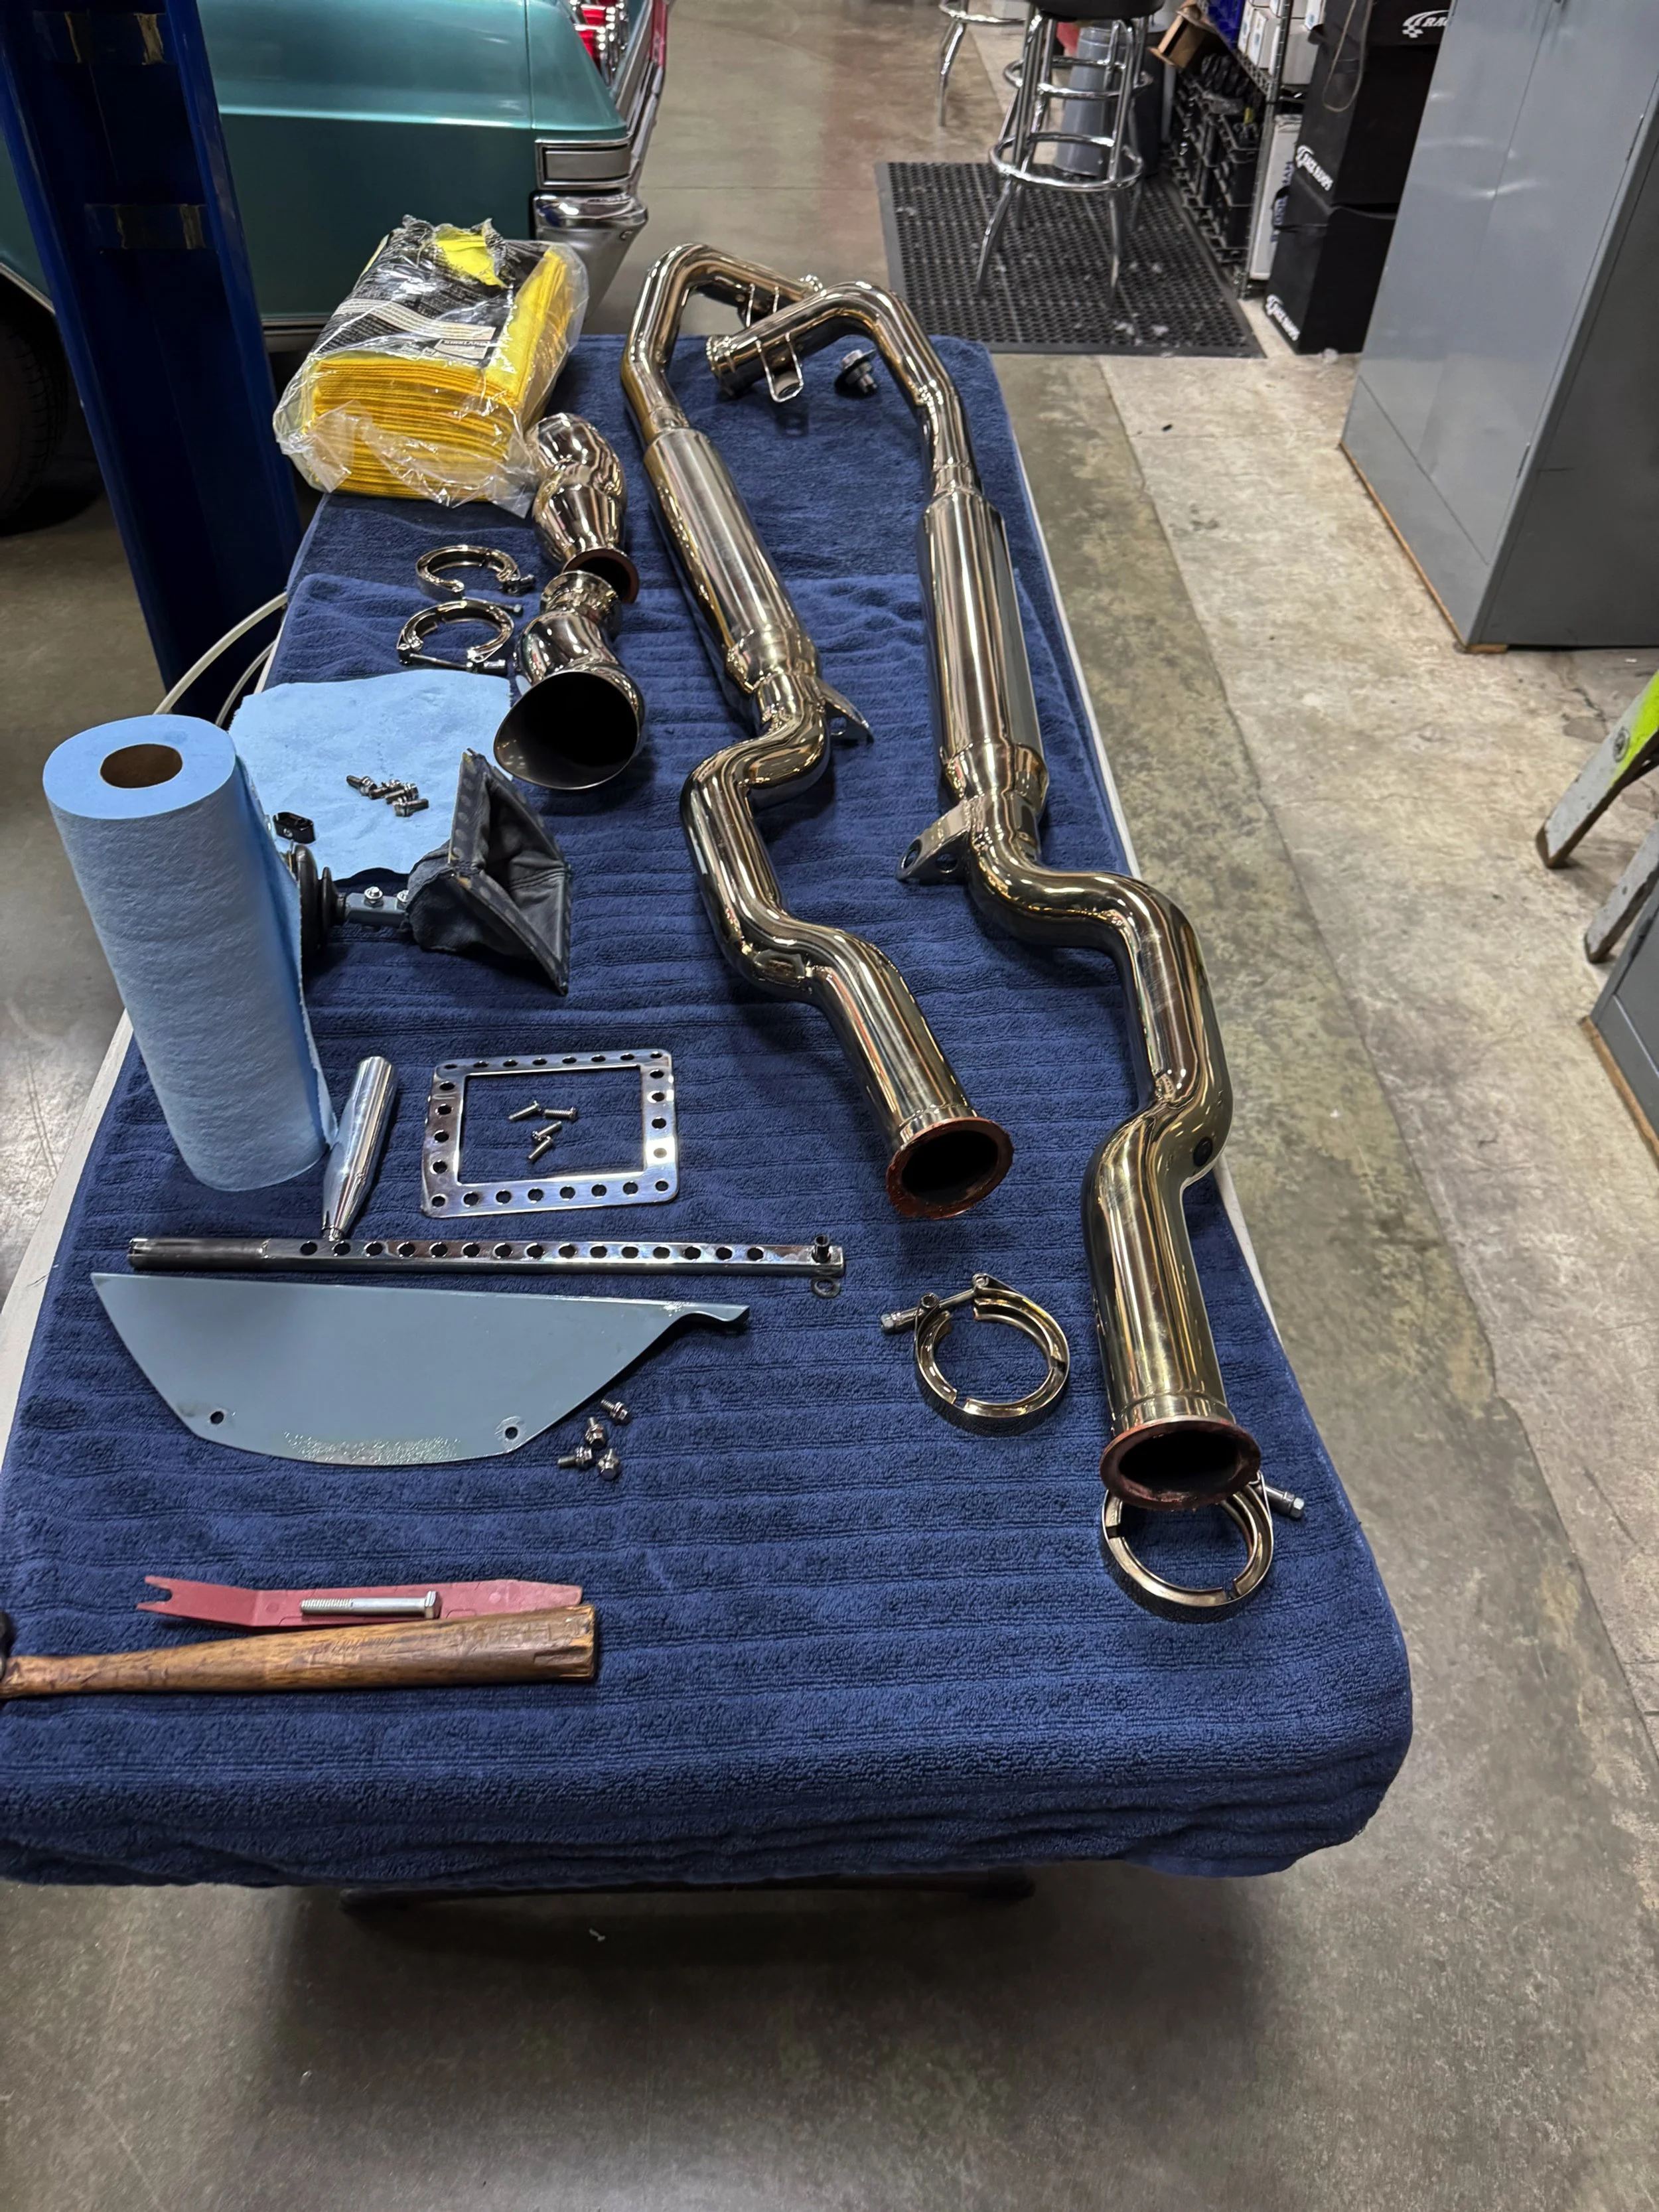
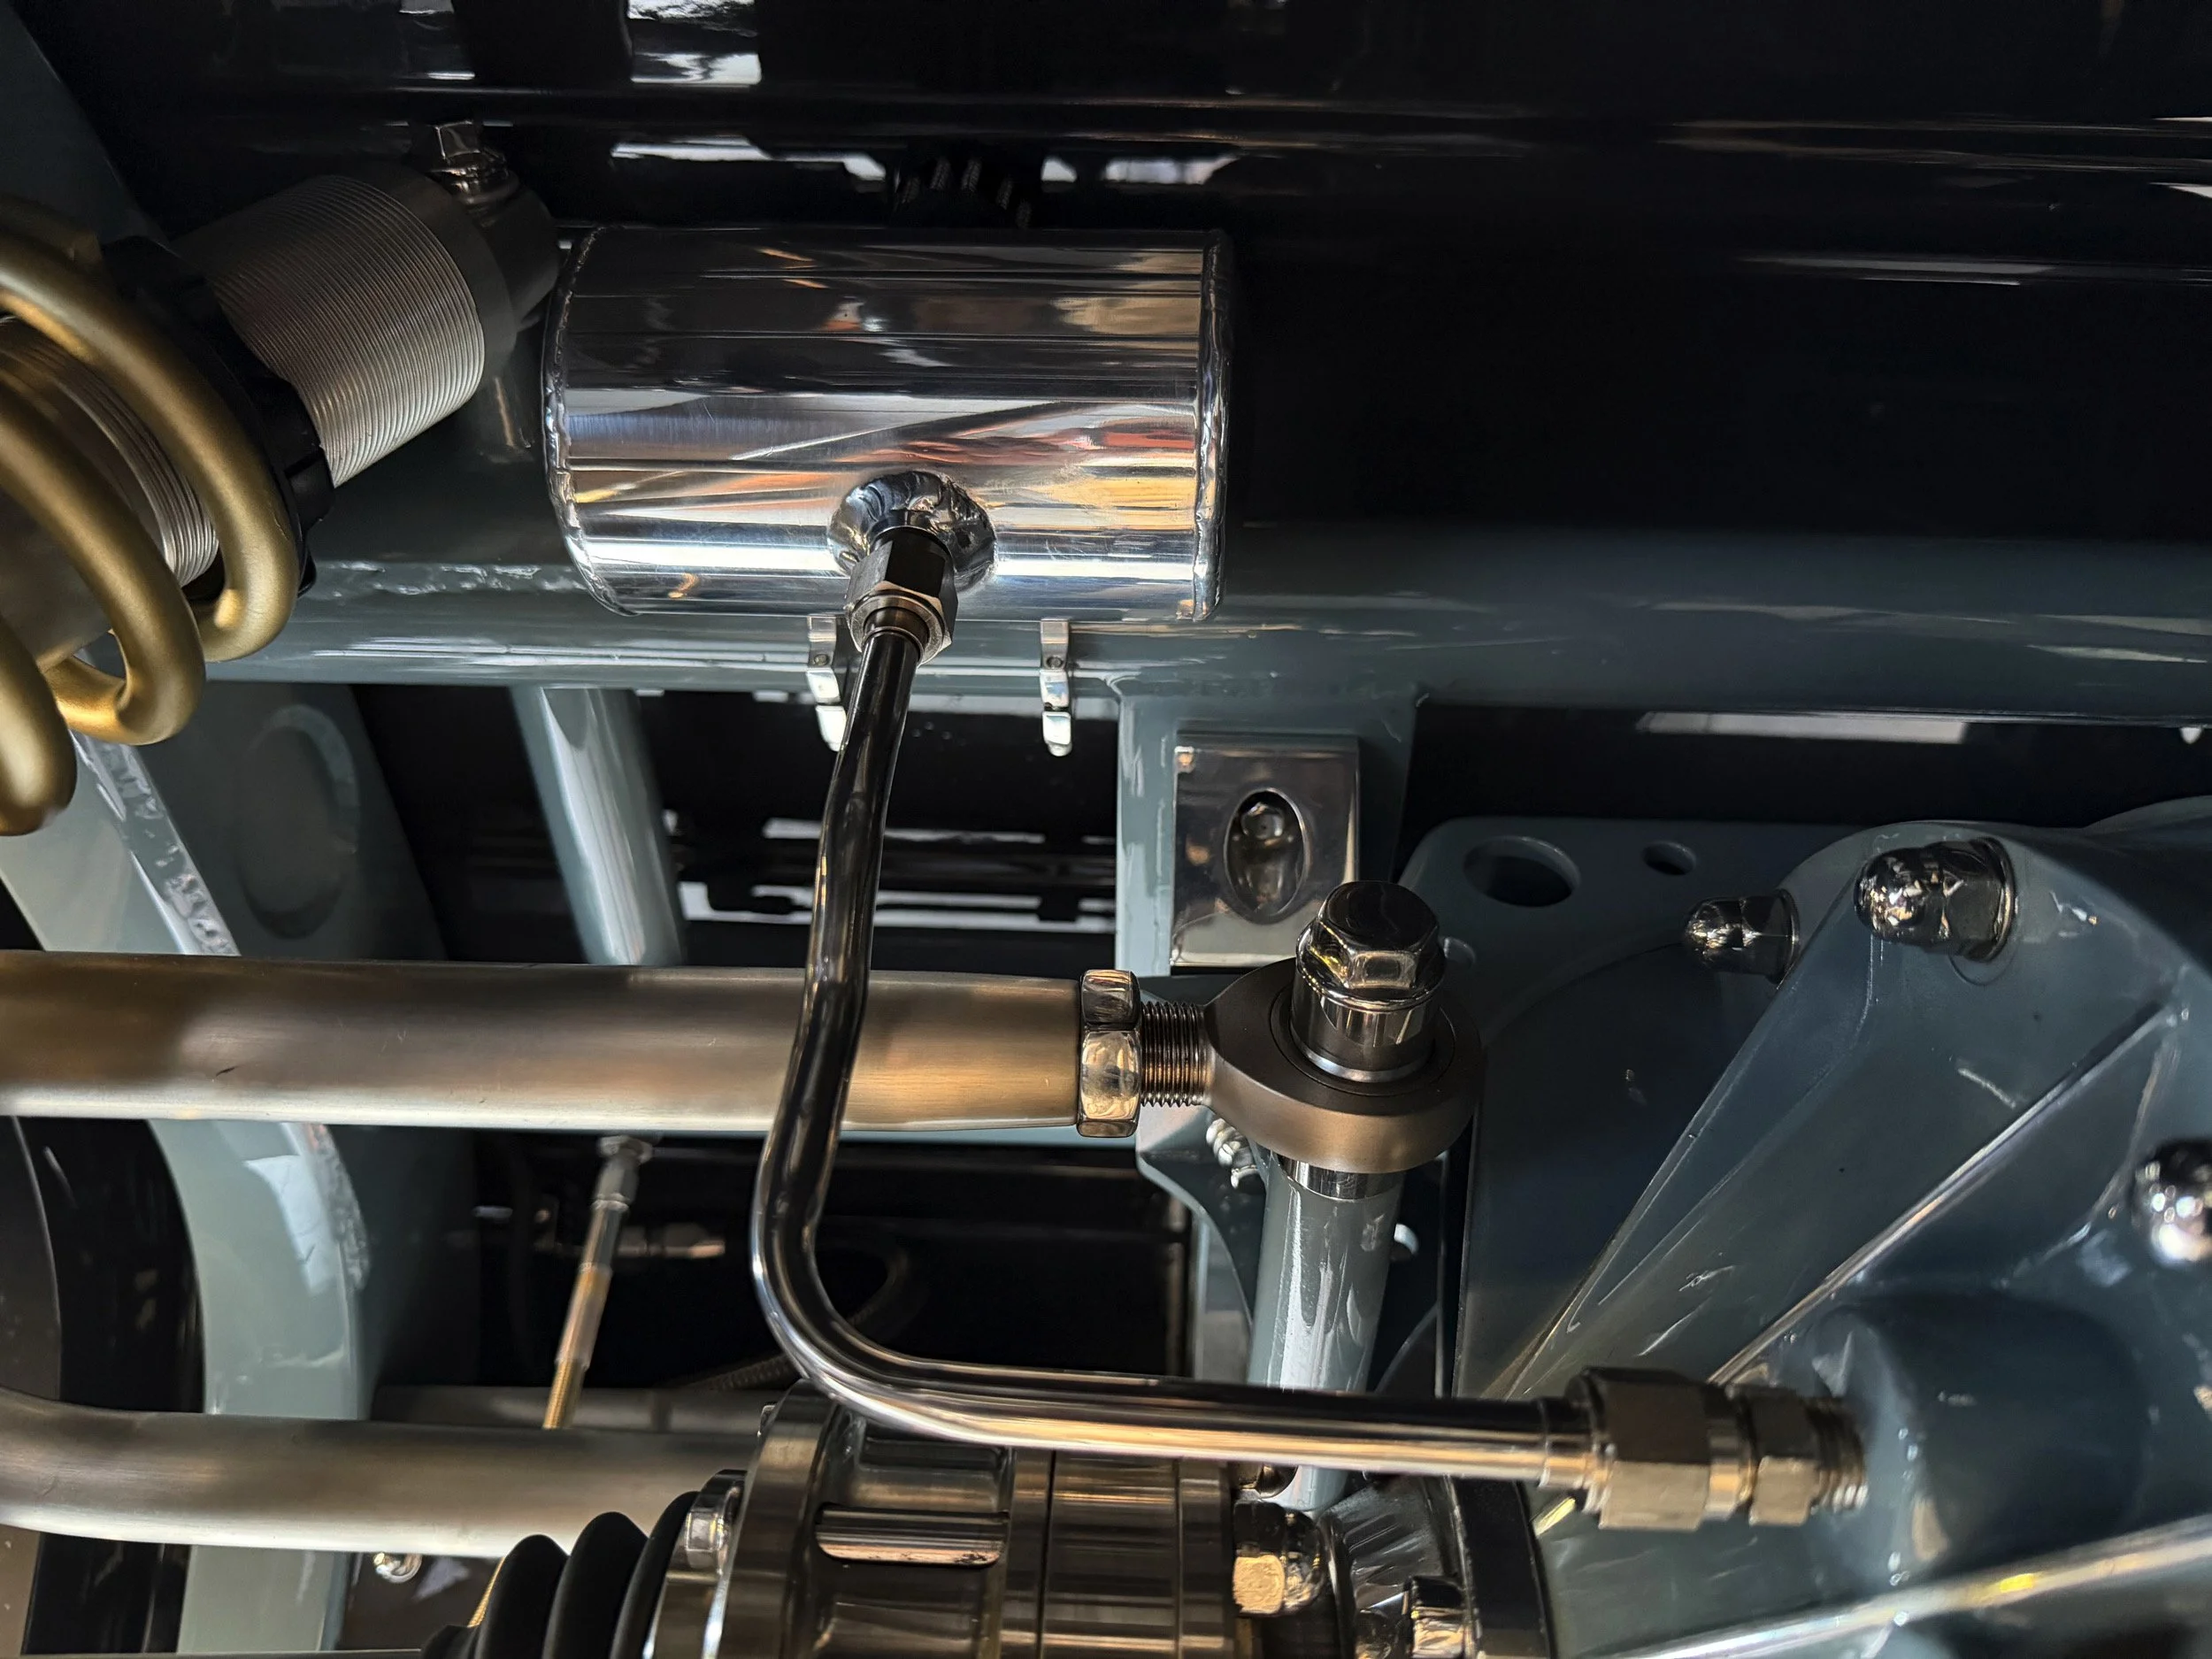
Most important, the clutch release bearing was replaced and the master cylinder flushed and bled. This entailed removing the bolt-in cross member frame, the exhaust, transmission crossmember, driveshaft, and finally the transmission.
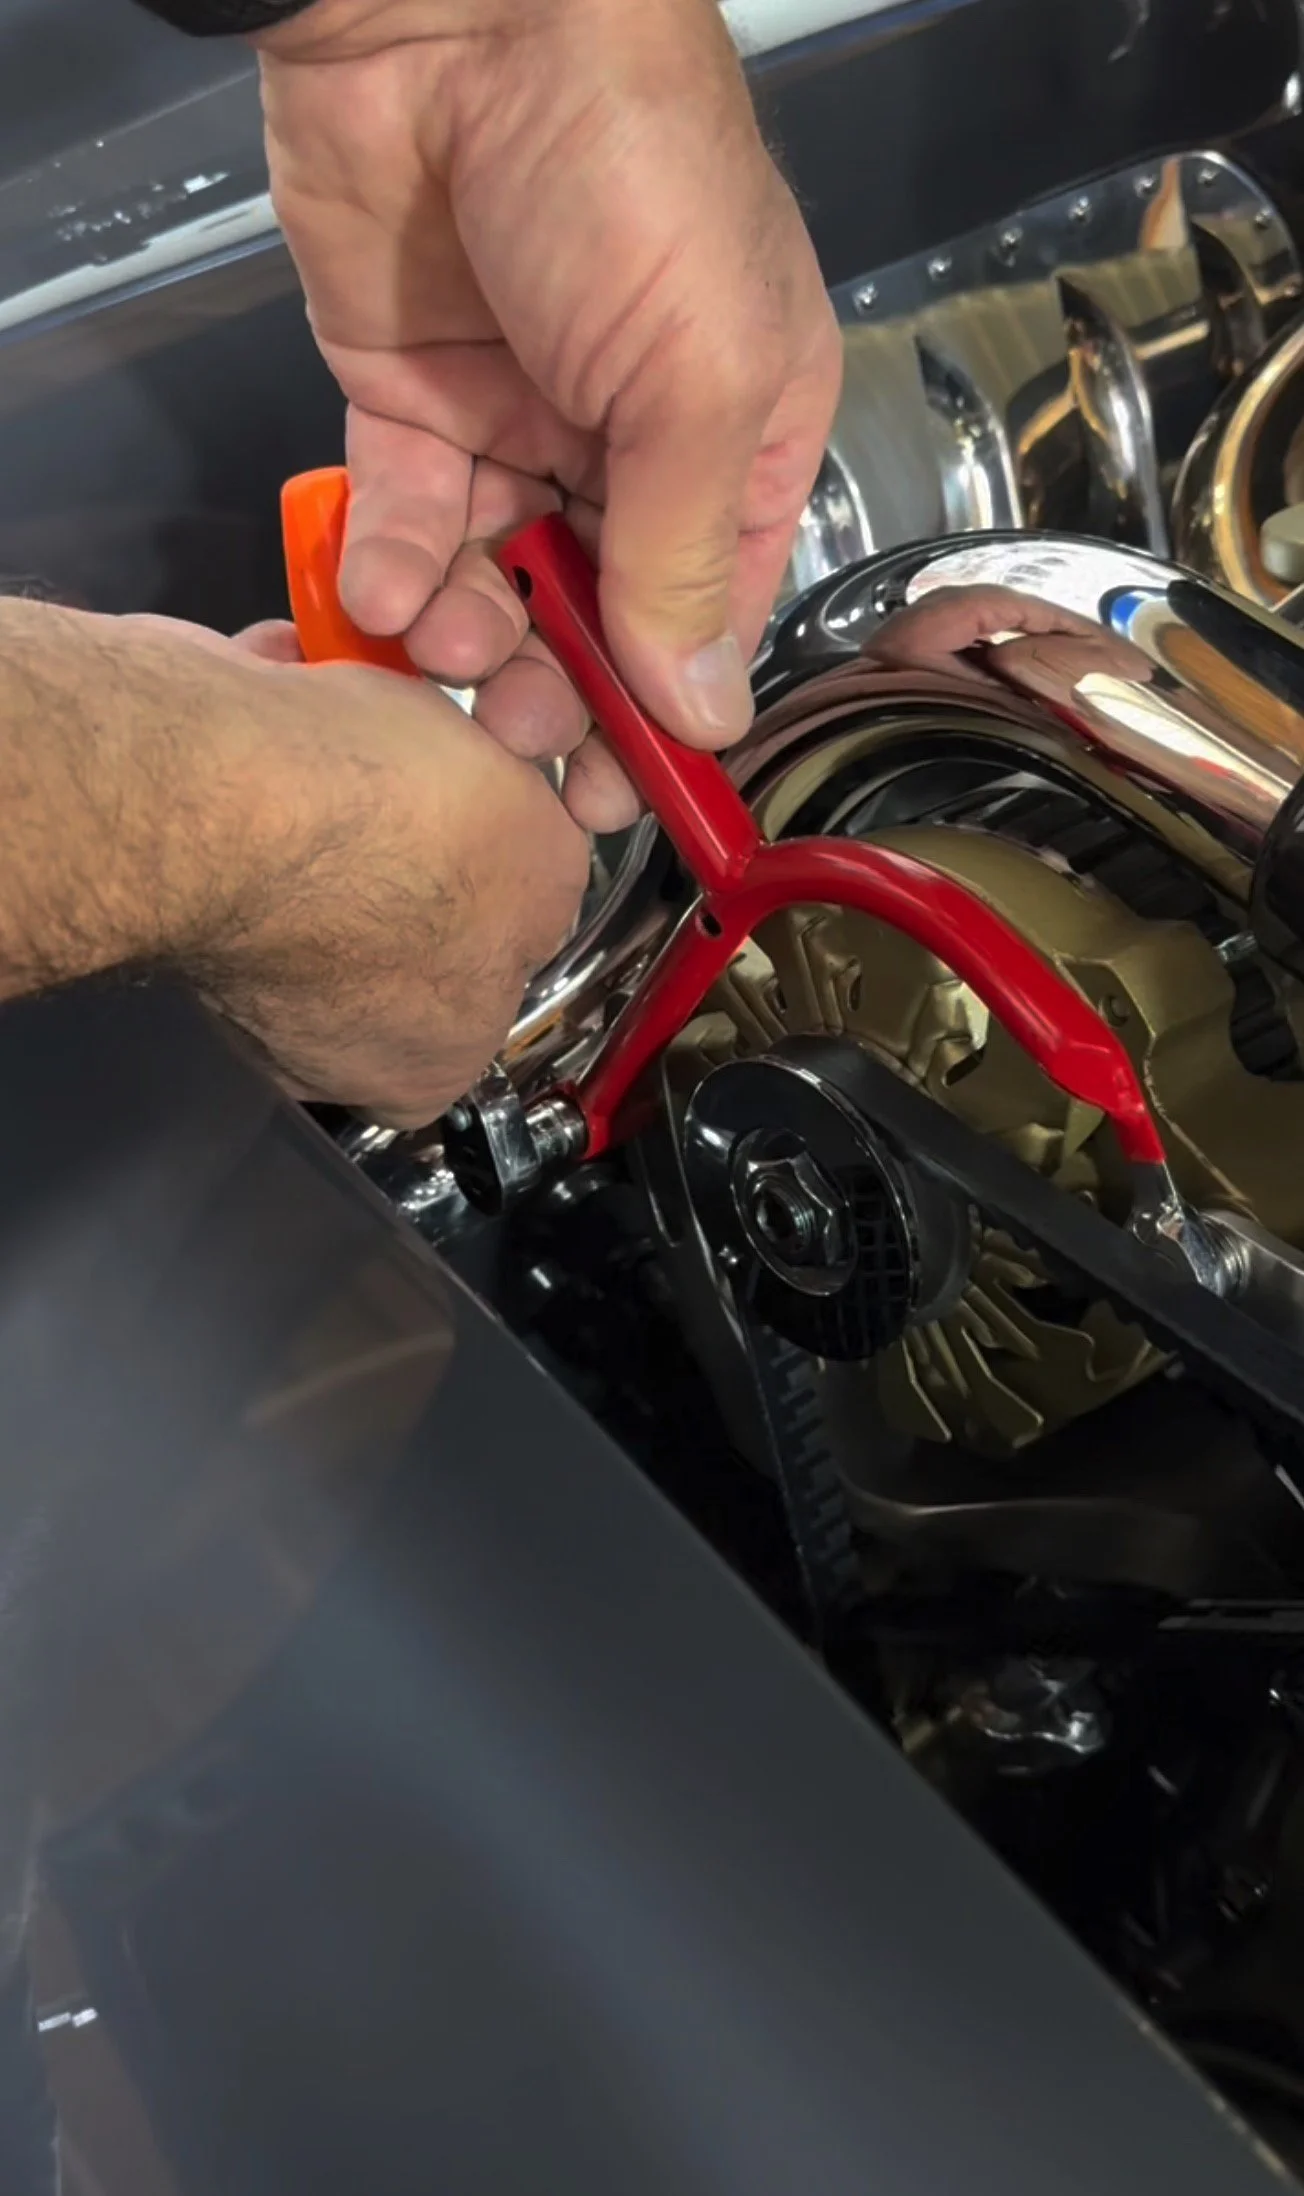
I had lots of problems as documented in earlier blog posts with alternator and AC compressor belts breaking. Once I got some working, they would squeal quite a bit, which means the belts are loose, but when I went too tight it seemed they would break. Wicked Fabrication created a tool to use when tightening the alternator, so I can pull up properly to get good tension.
With the AC compressor located at the bottom, we could see that the belt was sometimes touching the sway bar right below it. As well, the center crank bolt was not lining up with the hole in the radiator mesh cover. The rubber engine mounts were cracked and compressed, causing the engine to be lower than it was supposed to be. They replaced the rubber engine mount bushings, but also milled a center stop for each to disallow the rubber to be flattened. This lined up the pulley and the belts where they were supposed to be.
I had replaced the alternator earlier in the year, but the gold paint was not a match with the rest of the engine. The Wicked team mixed up the correct gold paint and refinished the alternator to match.
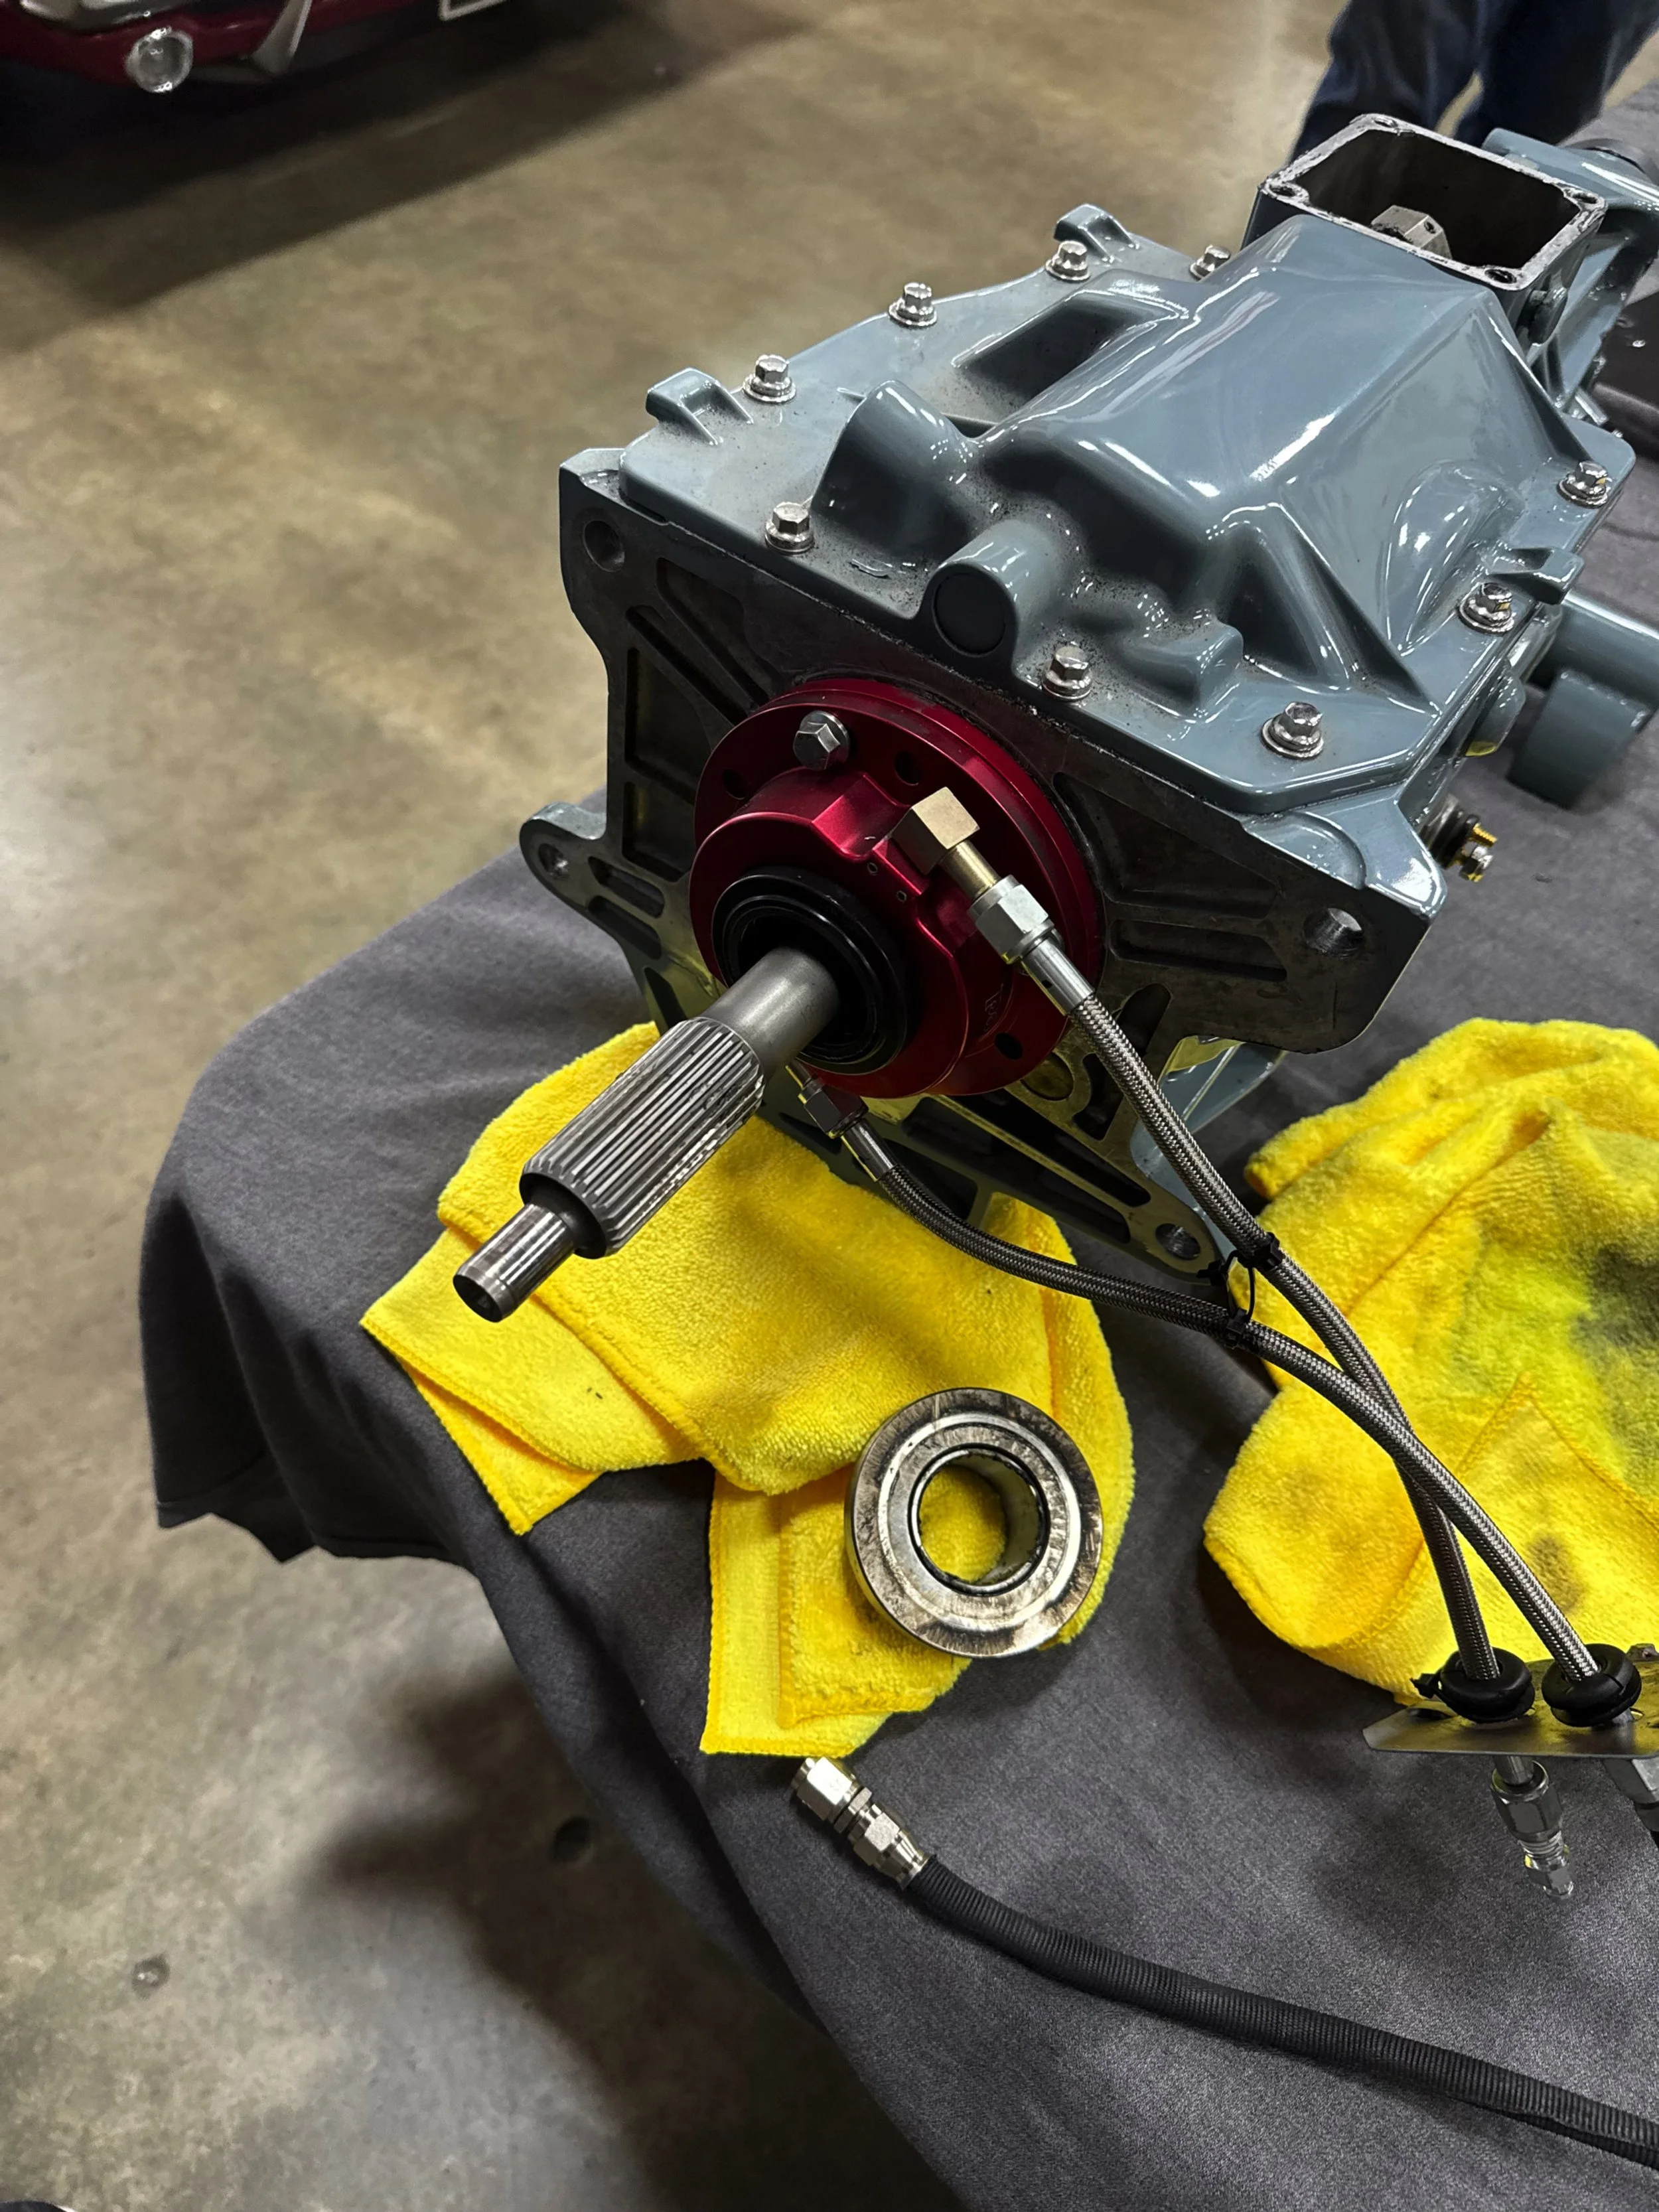
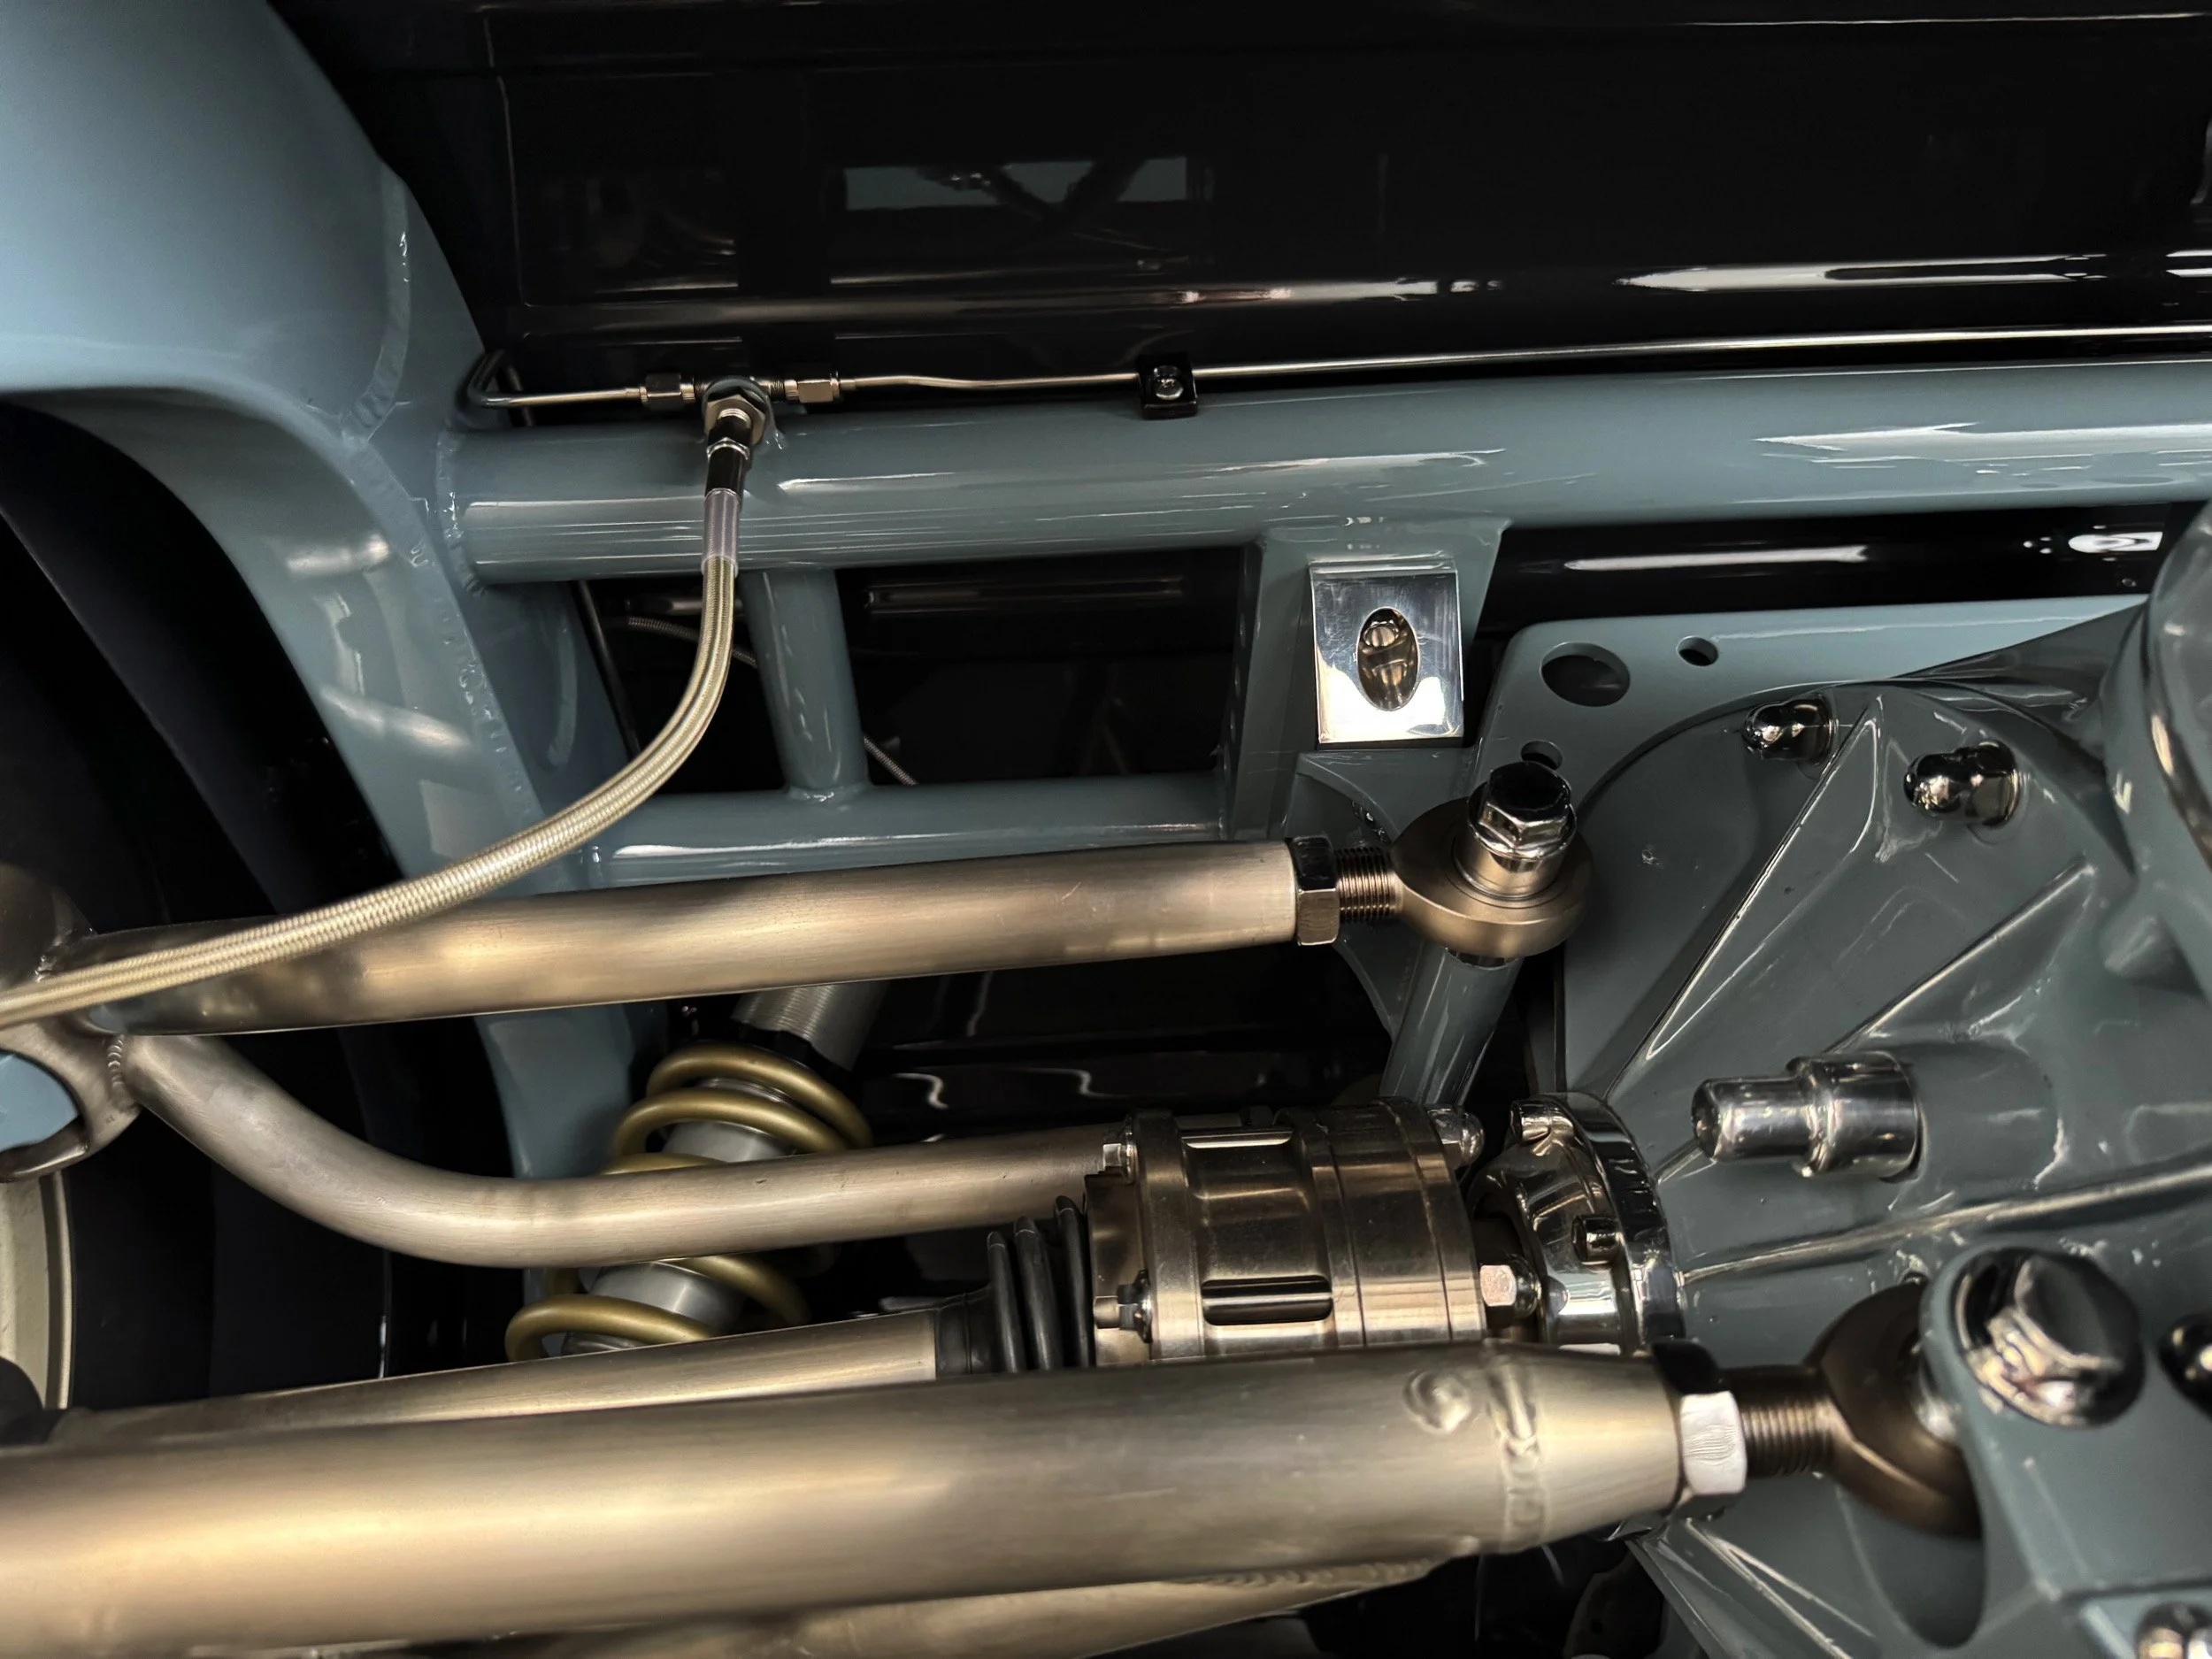
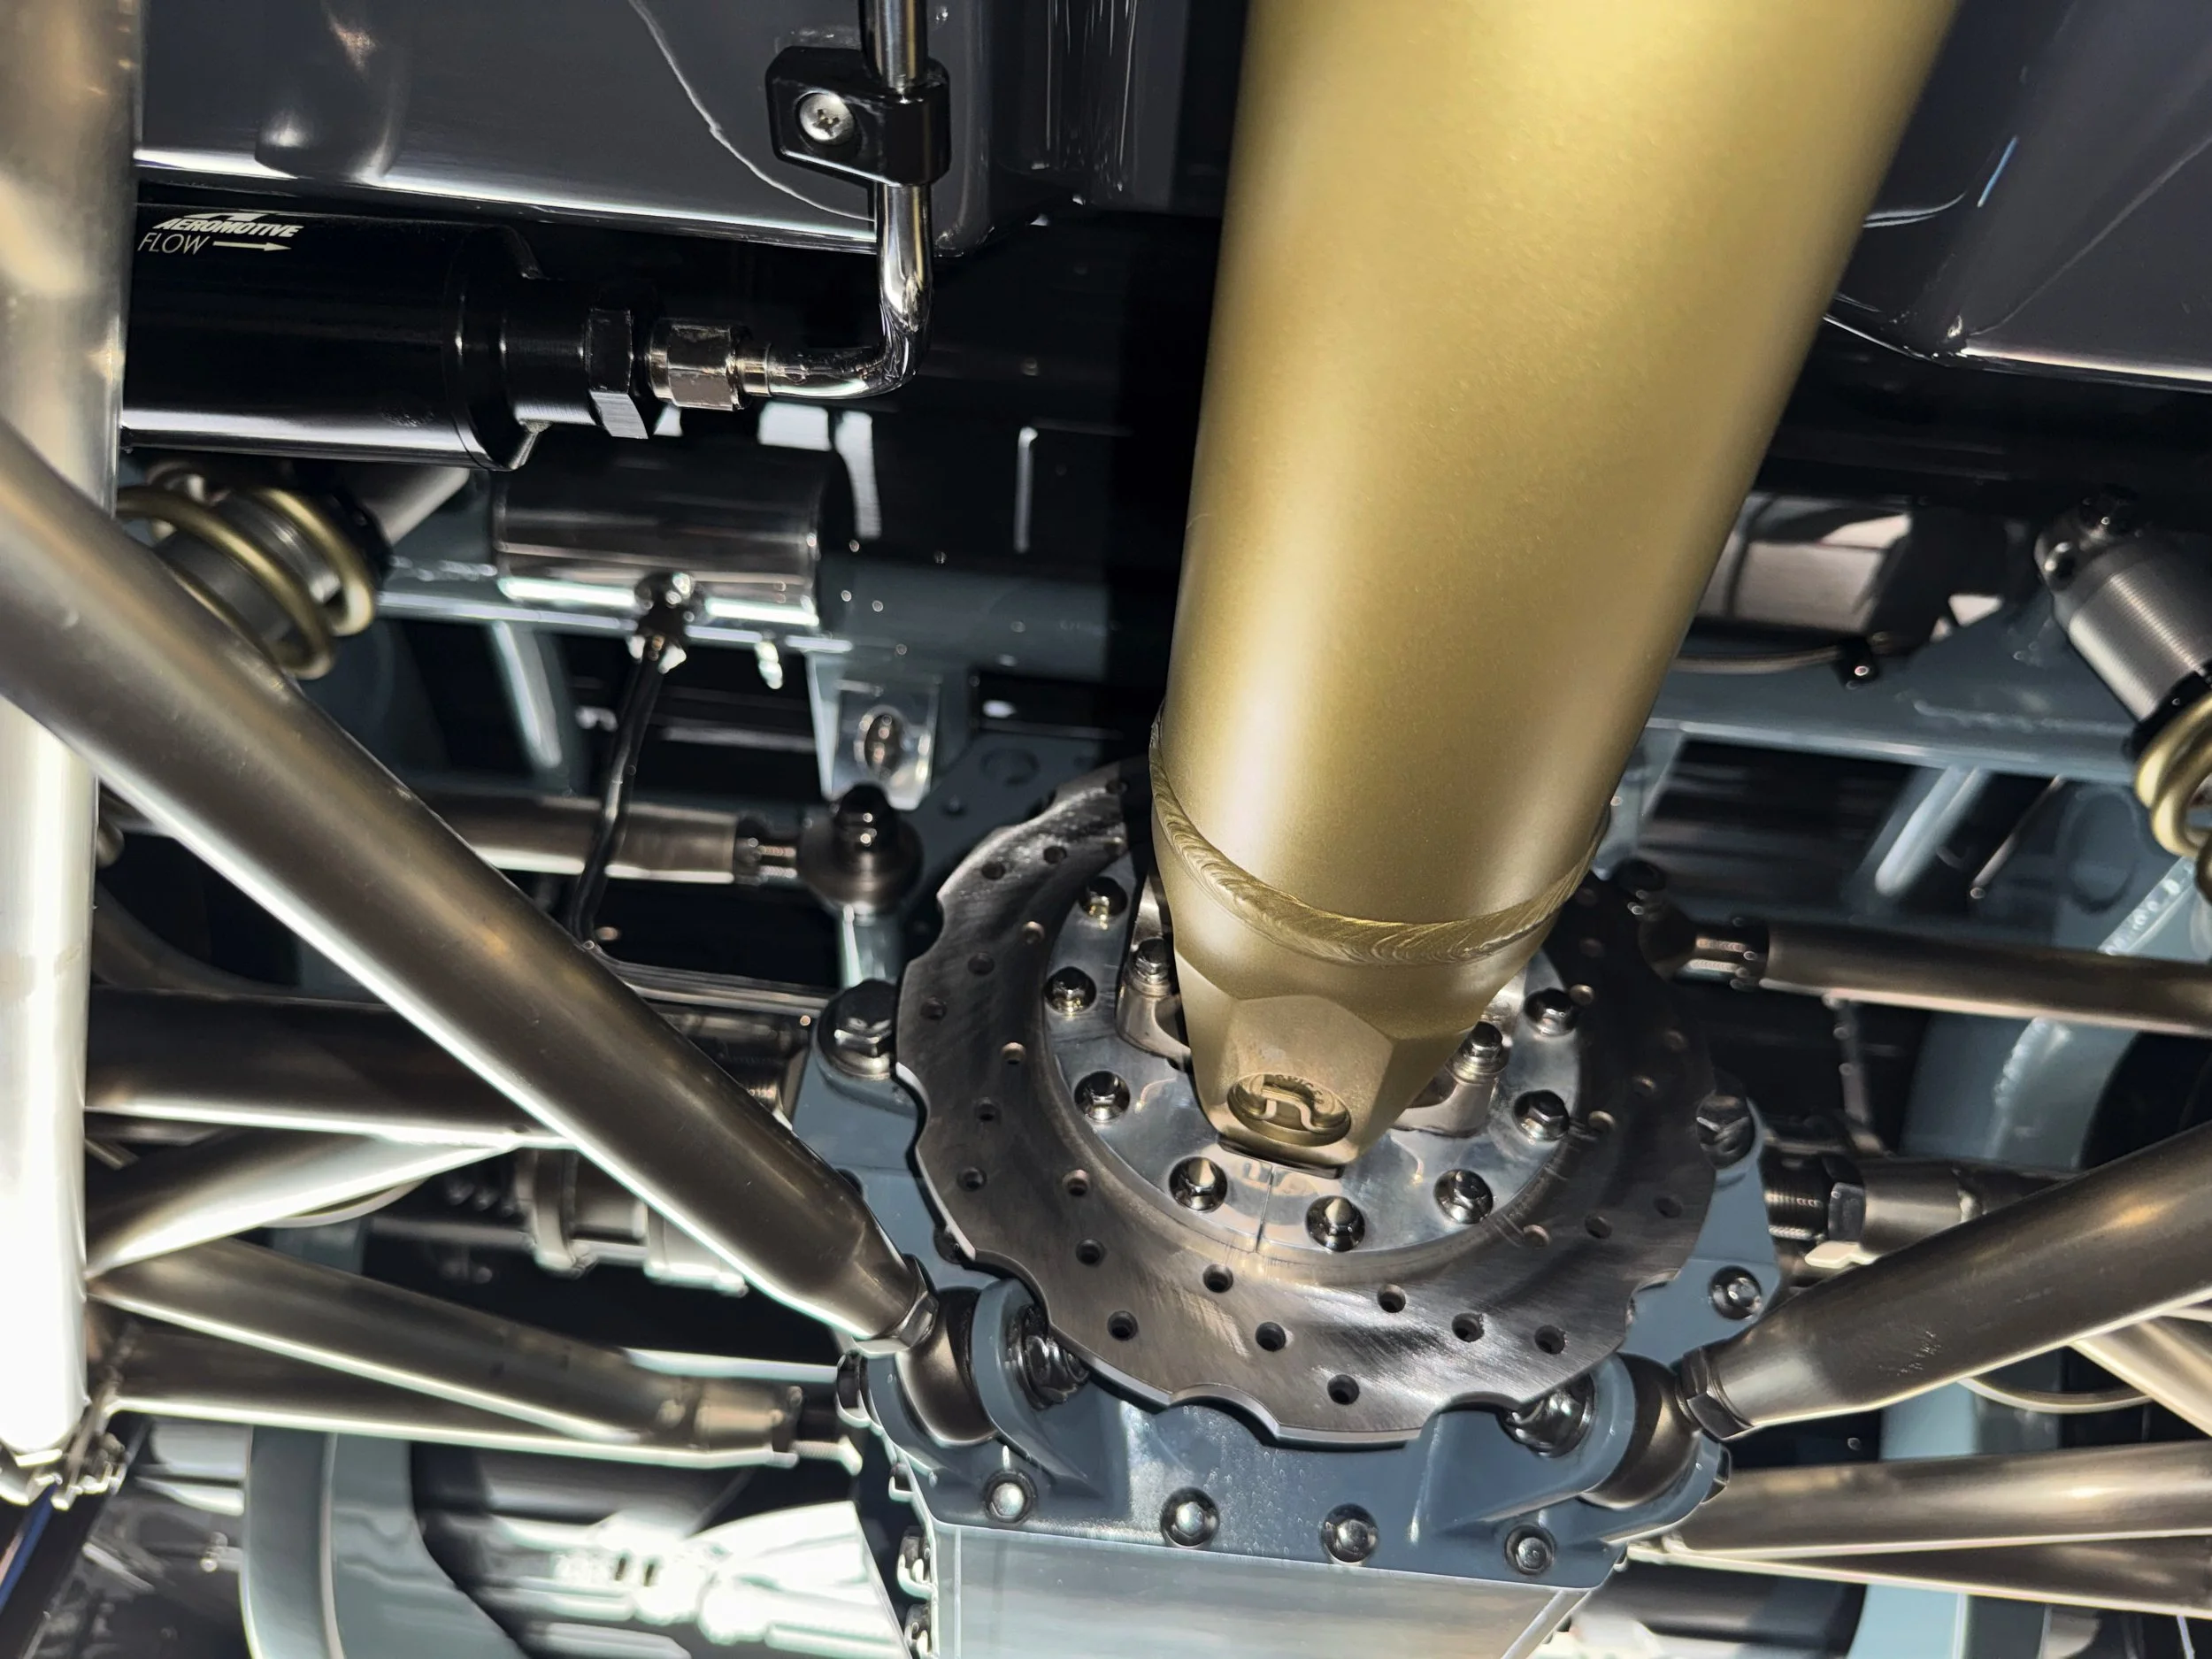
A small oil leak was traced to the quick-change center section in the rear end. After replacing the pinion seal and running further tests, we discovered that pressure buildup was forcing oil out. To resolve this, a custom polished aluminum reservoir with a breather was fabricated and connected to the center section, effectively eliminating the issue.
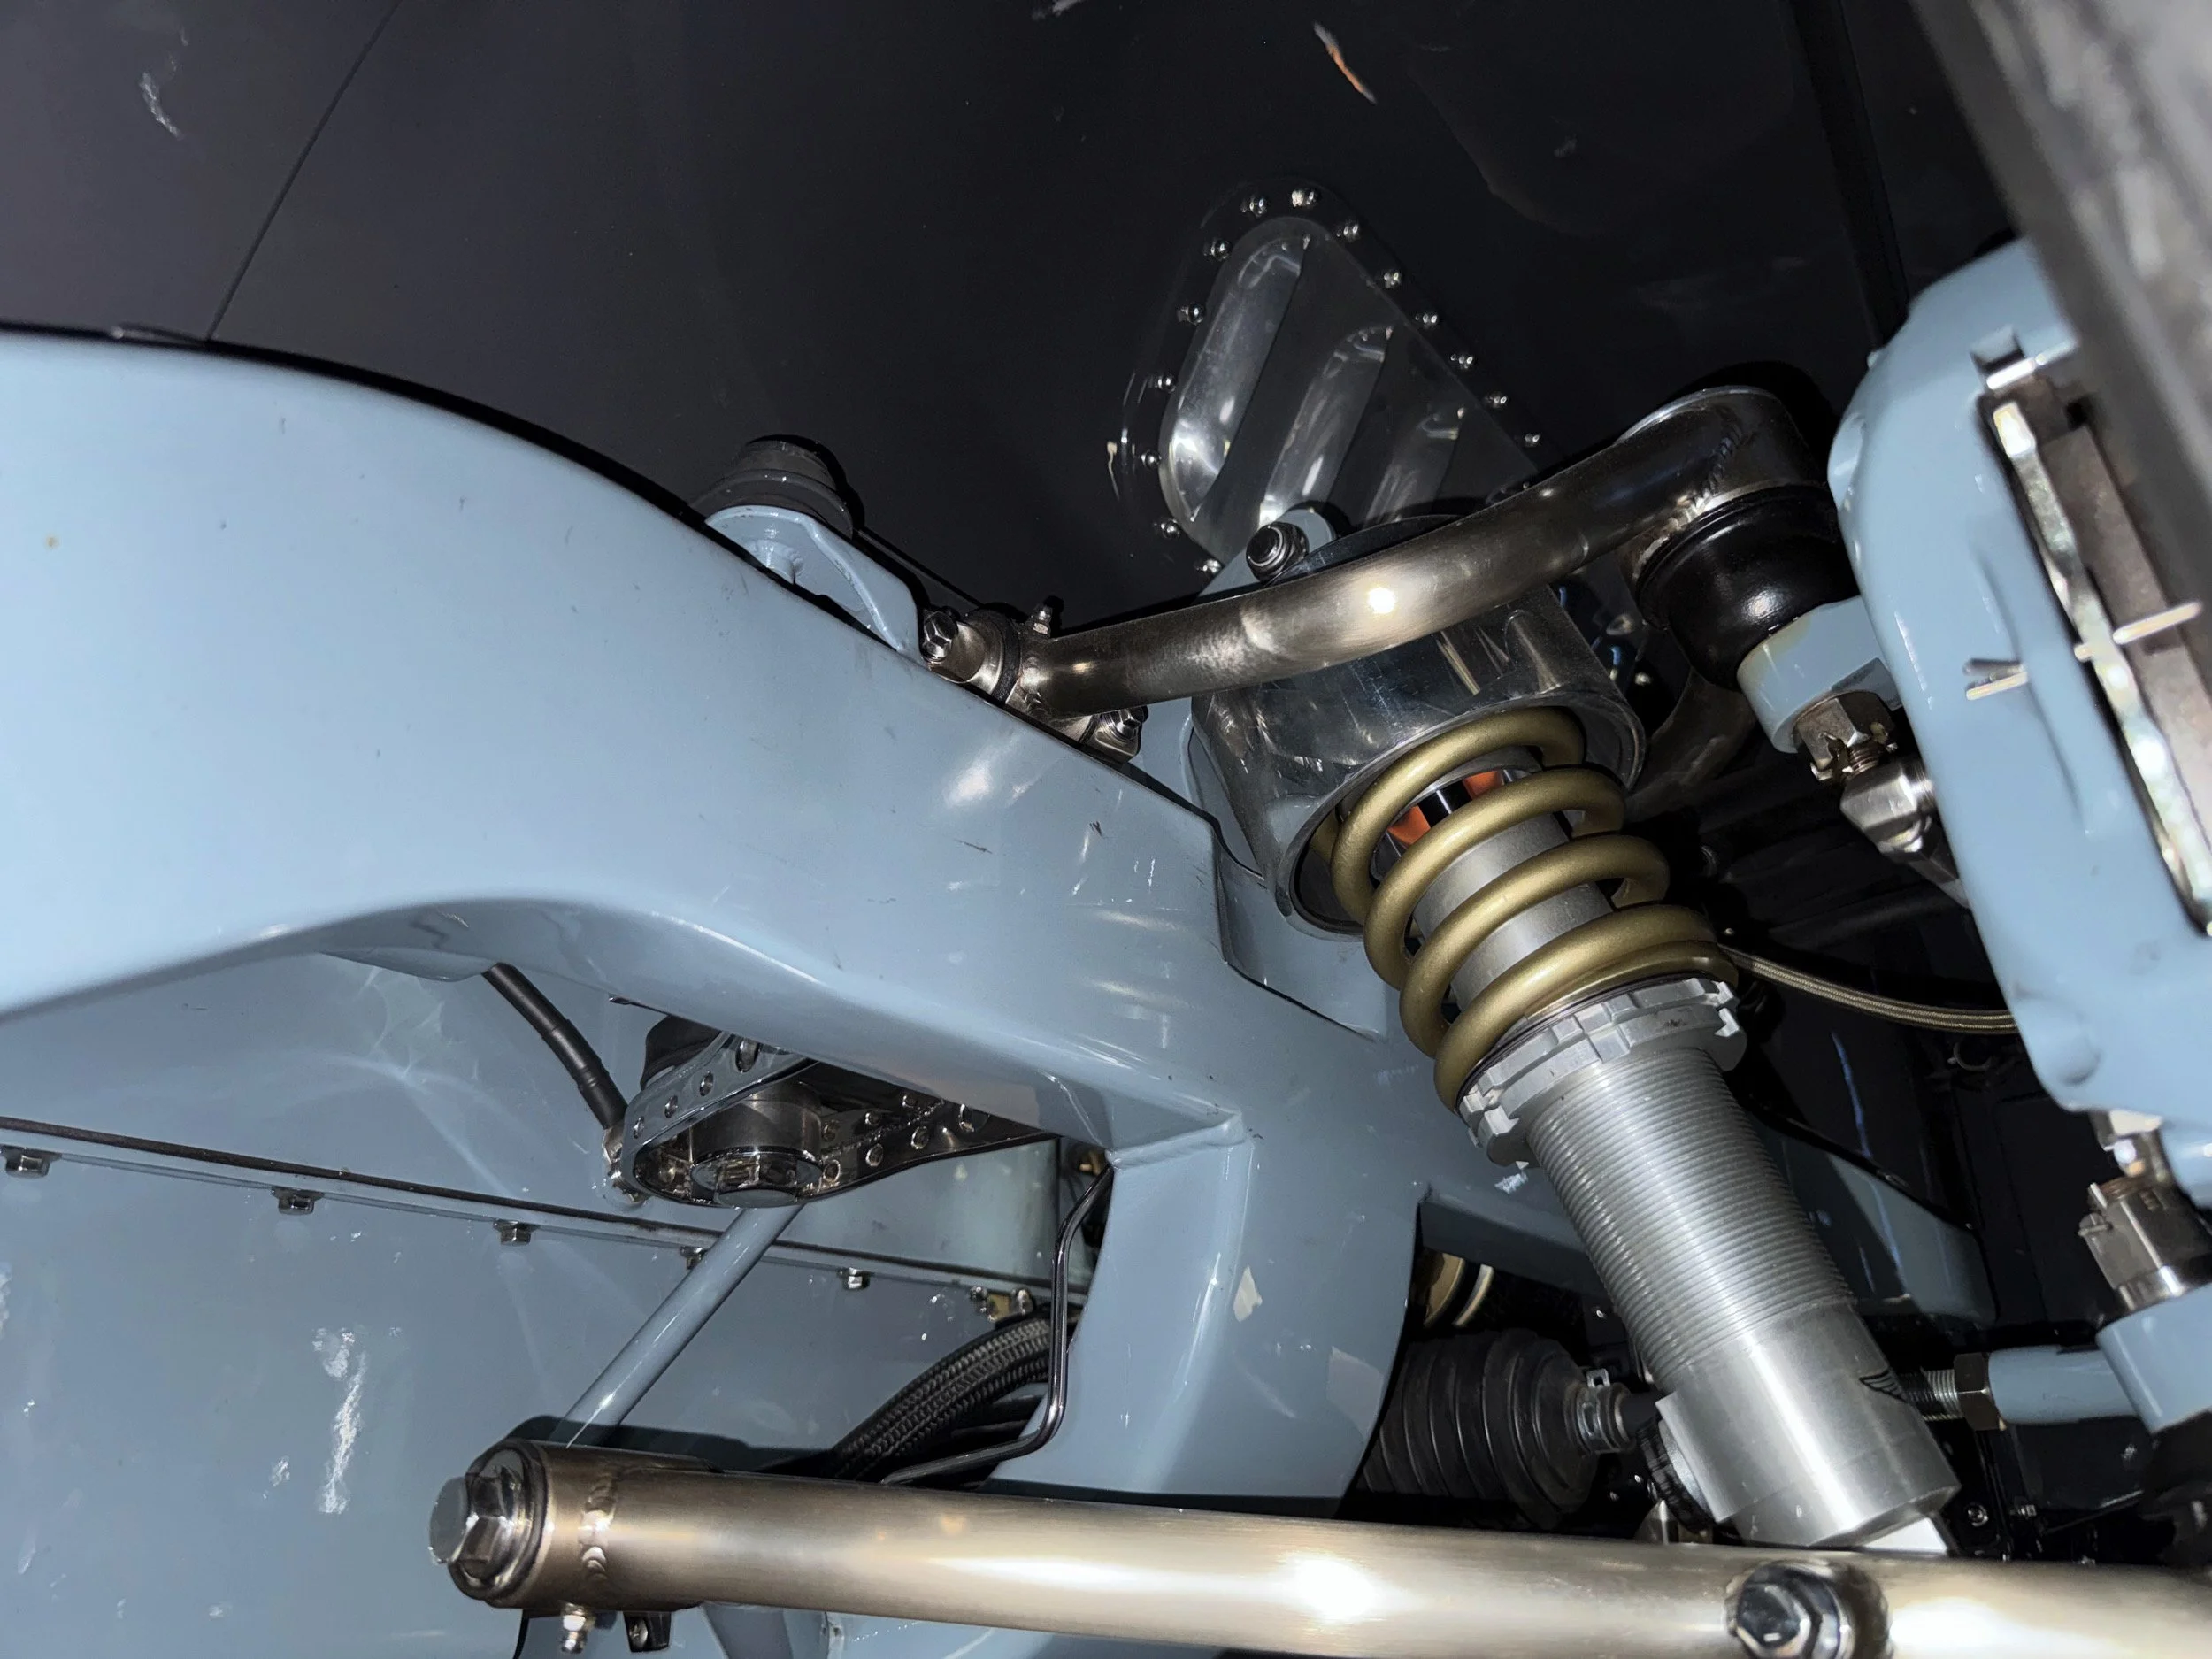
The suspension arms on the rear end are mostly Heim joints, except for the upper ones which had a poly type bushing that was getting a bit chewed up. The team changed these out for custom Heim joints as well.
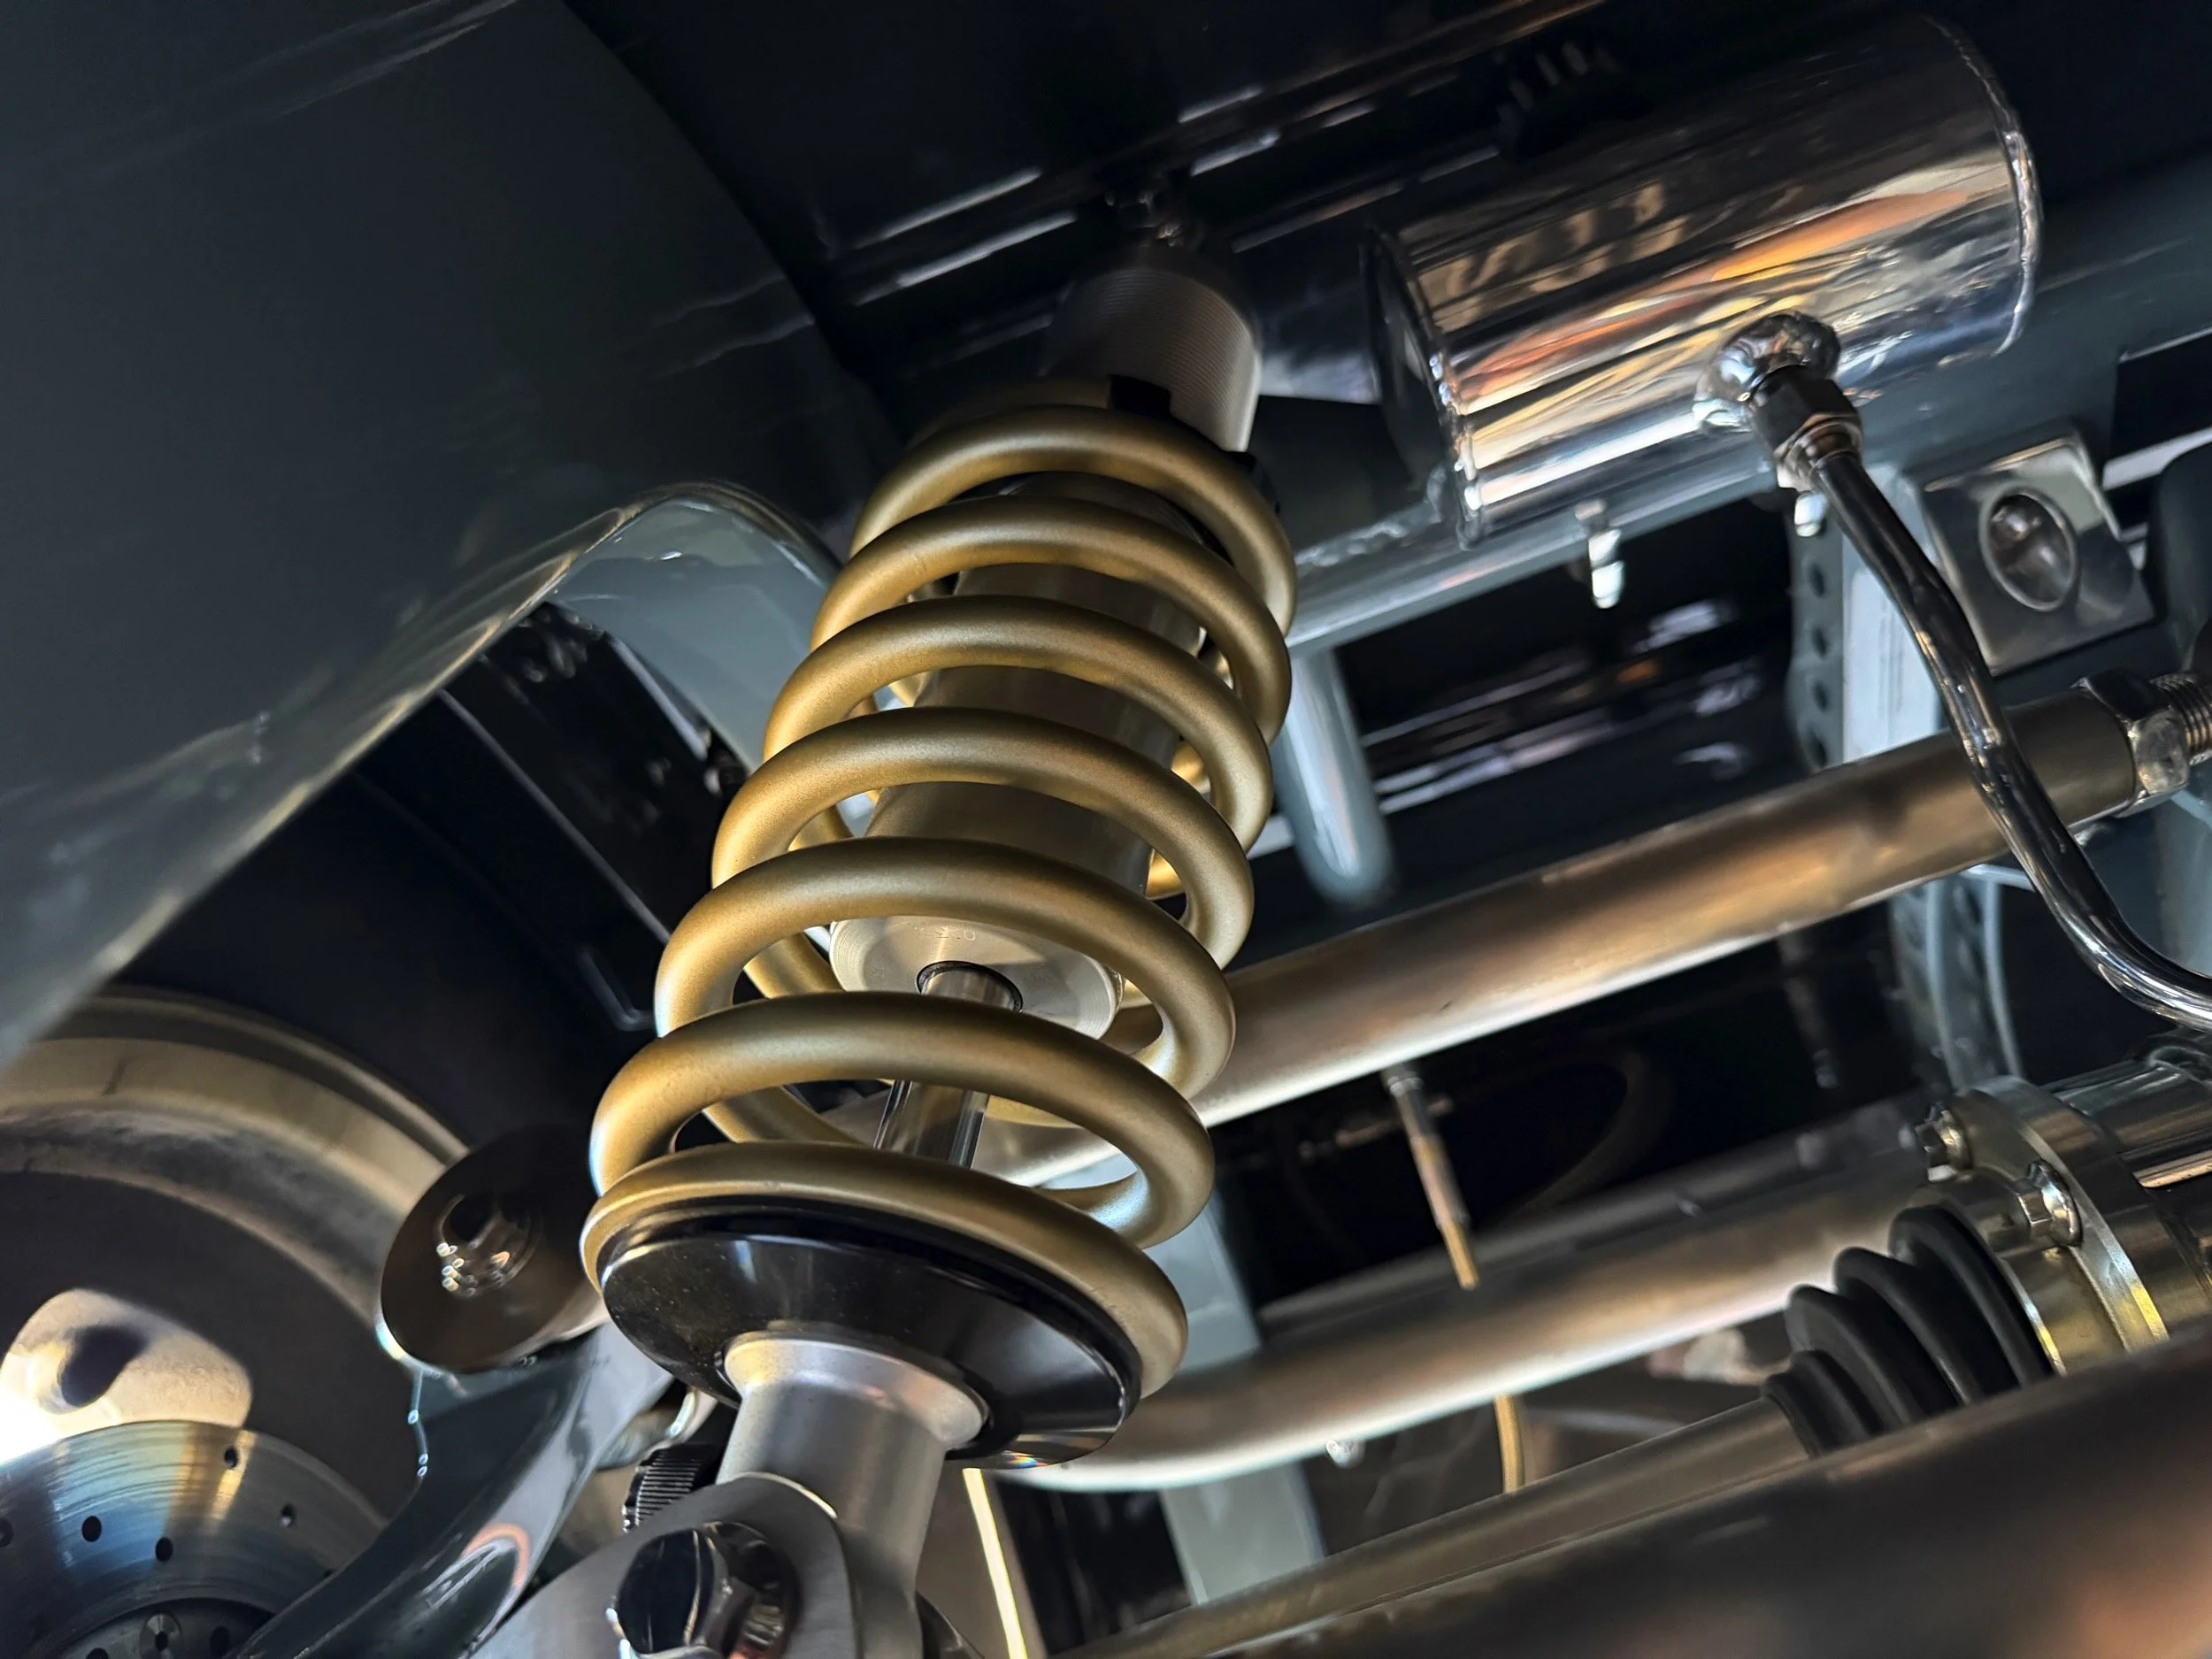
All four shocks were Koni coil-overs. I started to notice the nylon bushing on each of the adjustable perches were cracking and was able to get new perches and Torrington bearings to replace the nylon bushings. These were installed on the front shocks.
I found myself scraping the frame a few times while driving around, so I wanted to raise the entire car about 1”. The rear Koni coil-overs were already extended to their max, so they were replaced with Ride Tech coil-overs that look similar to the older Konis.
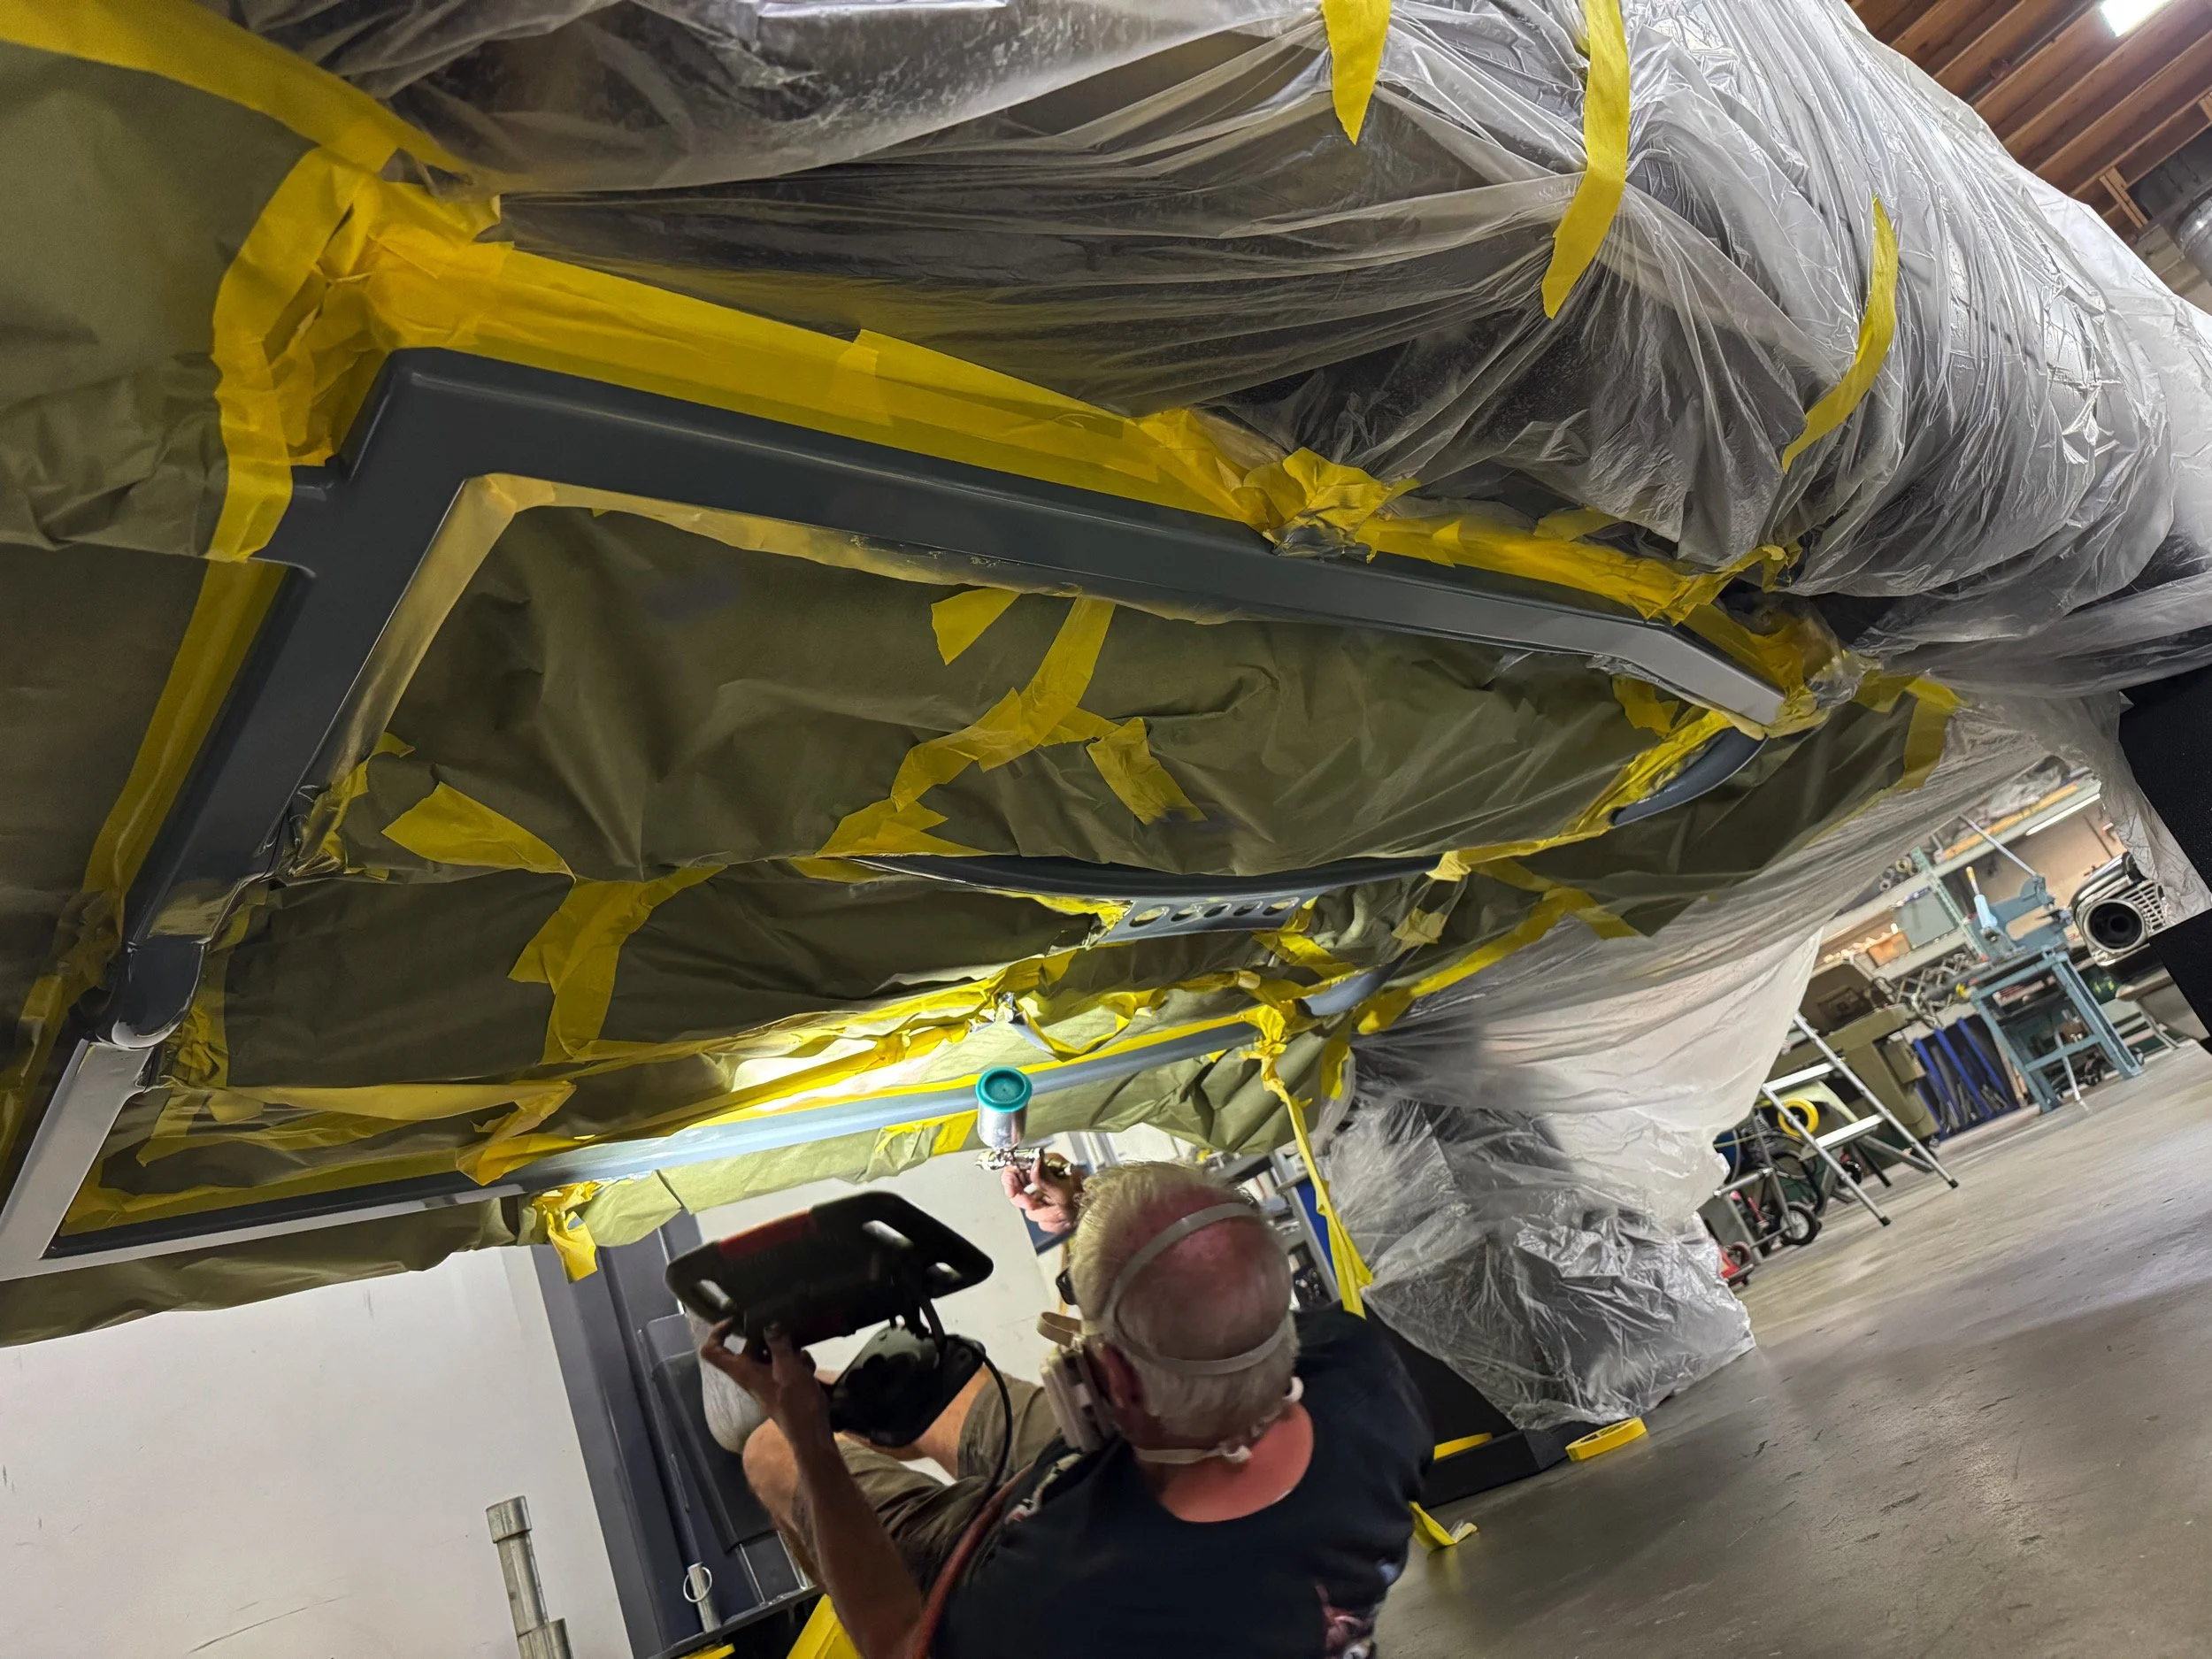
During its time going to car shows, the frame was scraped up a few times. The team sanded down all of the scrapes, chips, and temporary airbrush touchup that I did on the frame. Craig brought back Jon Byers to reshoot the frame so it looks nice again. Thanks Jon!
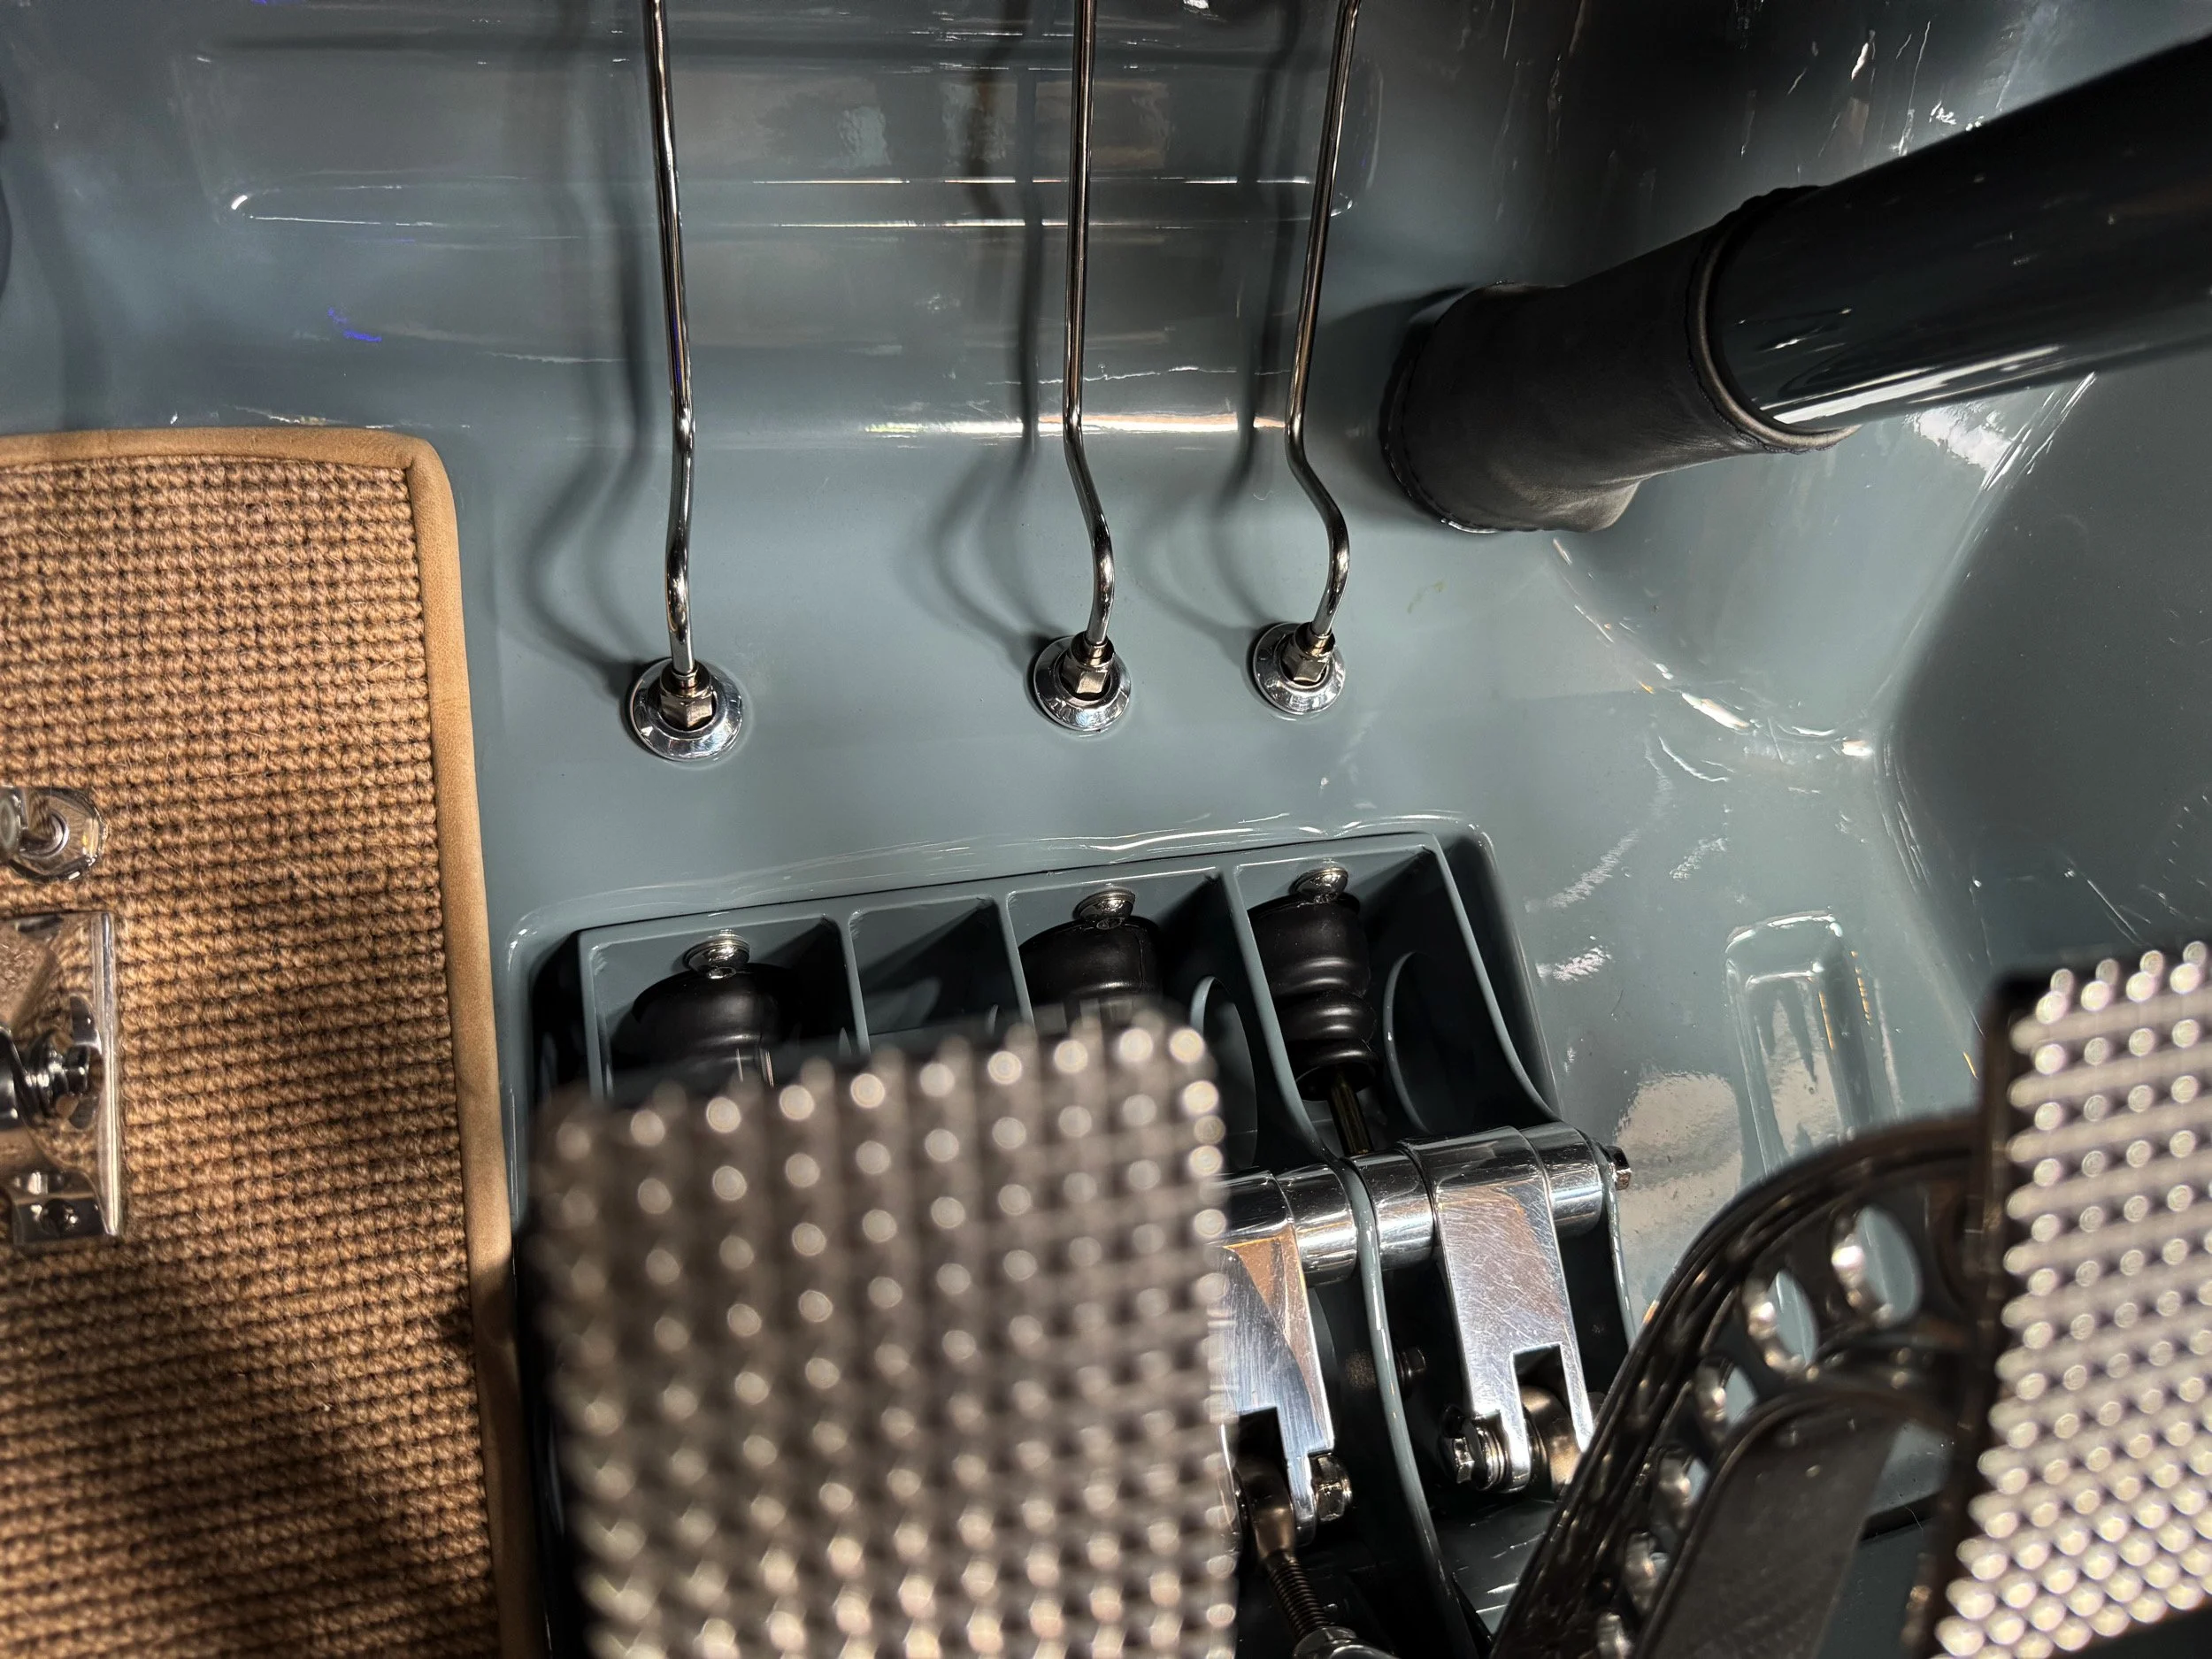
The parking brake was somewhat weak, so the team replaced the master cylinder, resurfaced the rotor mounted on the rear of the drive shaft, and replaced the pads.
The brakes perform much better since replacing the master cylinders. However, the team replaced the brake pads with a different compound and re-bled the brakes for better feel.
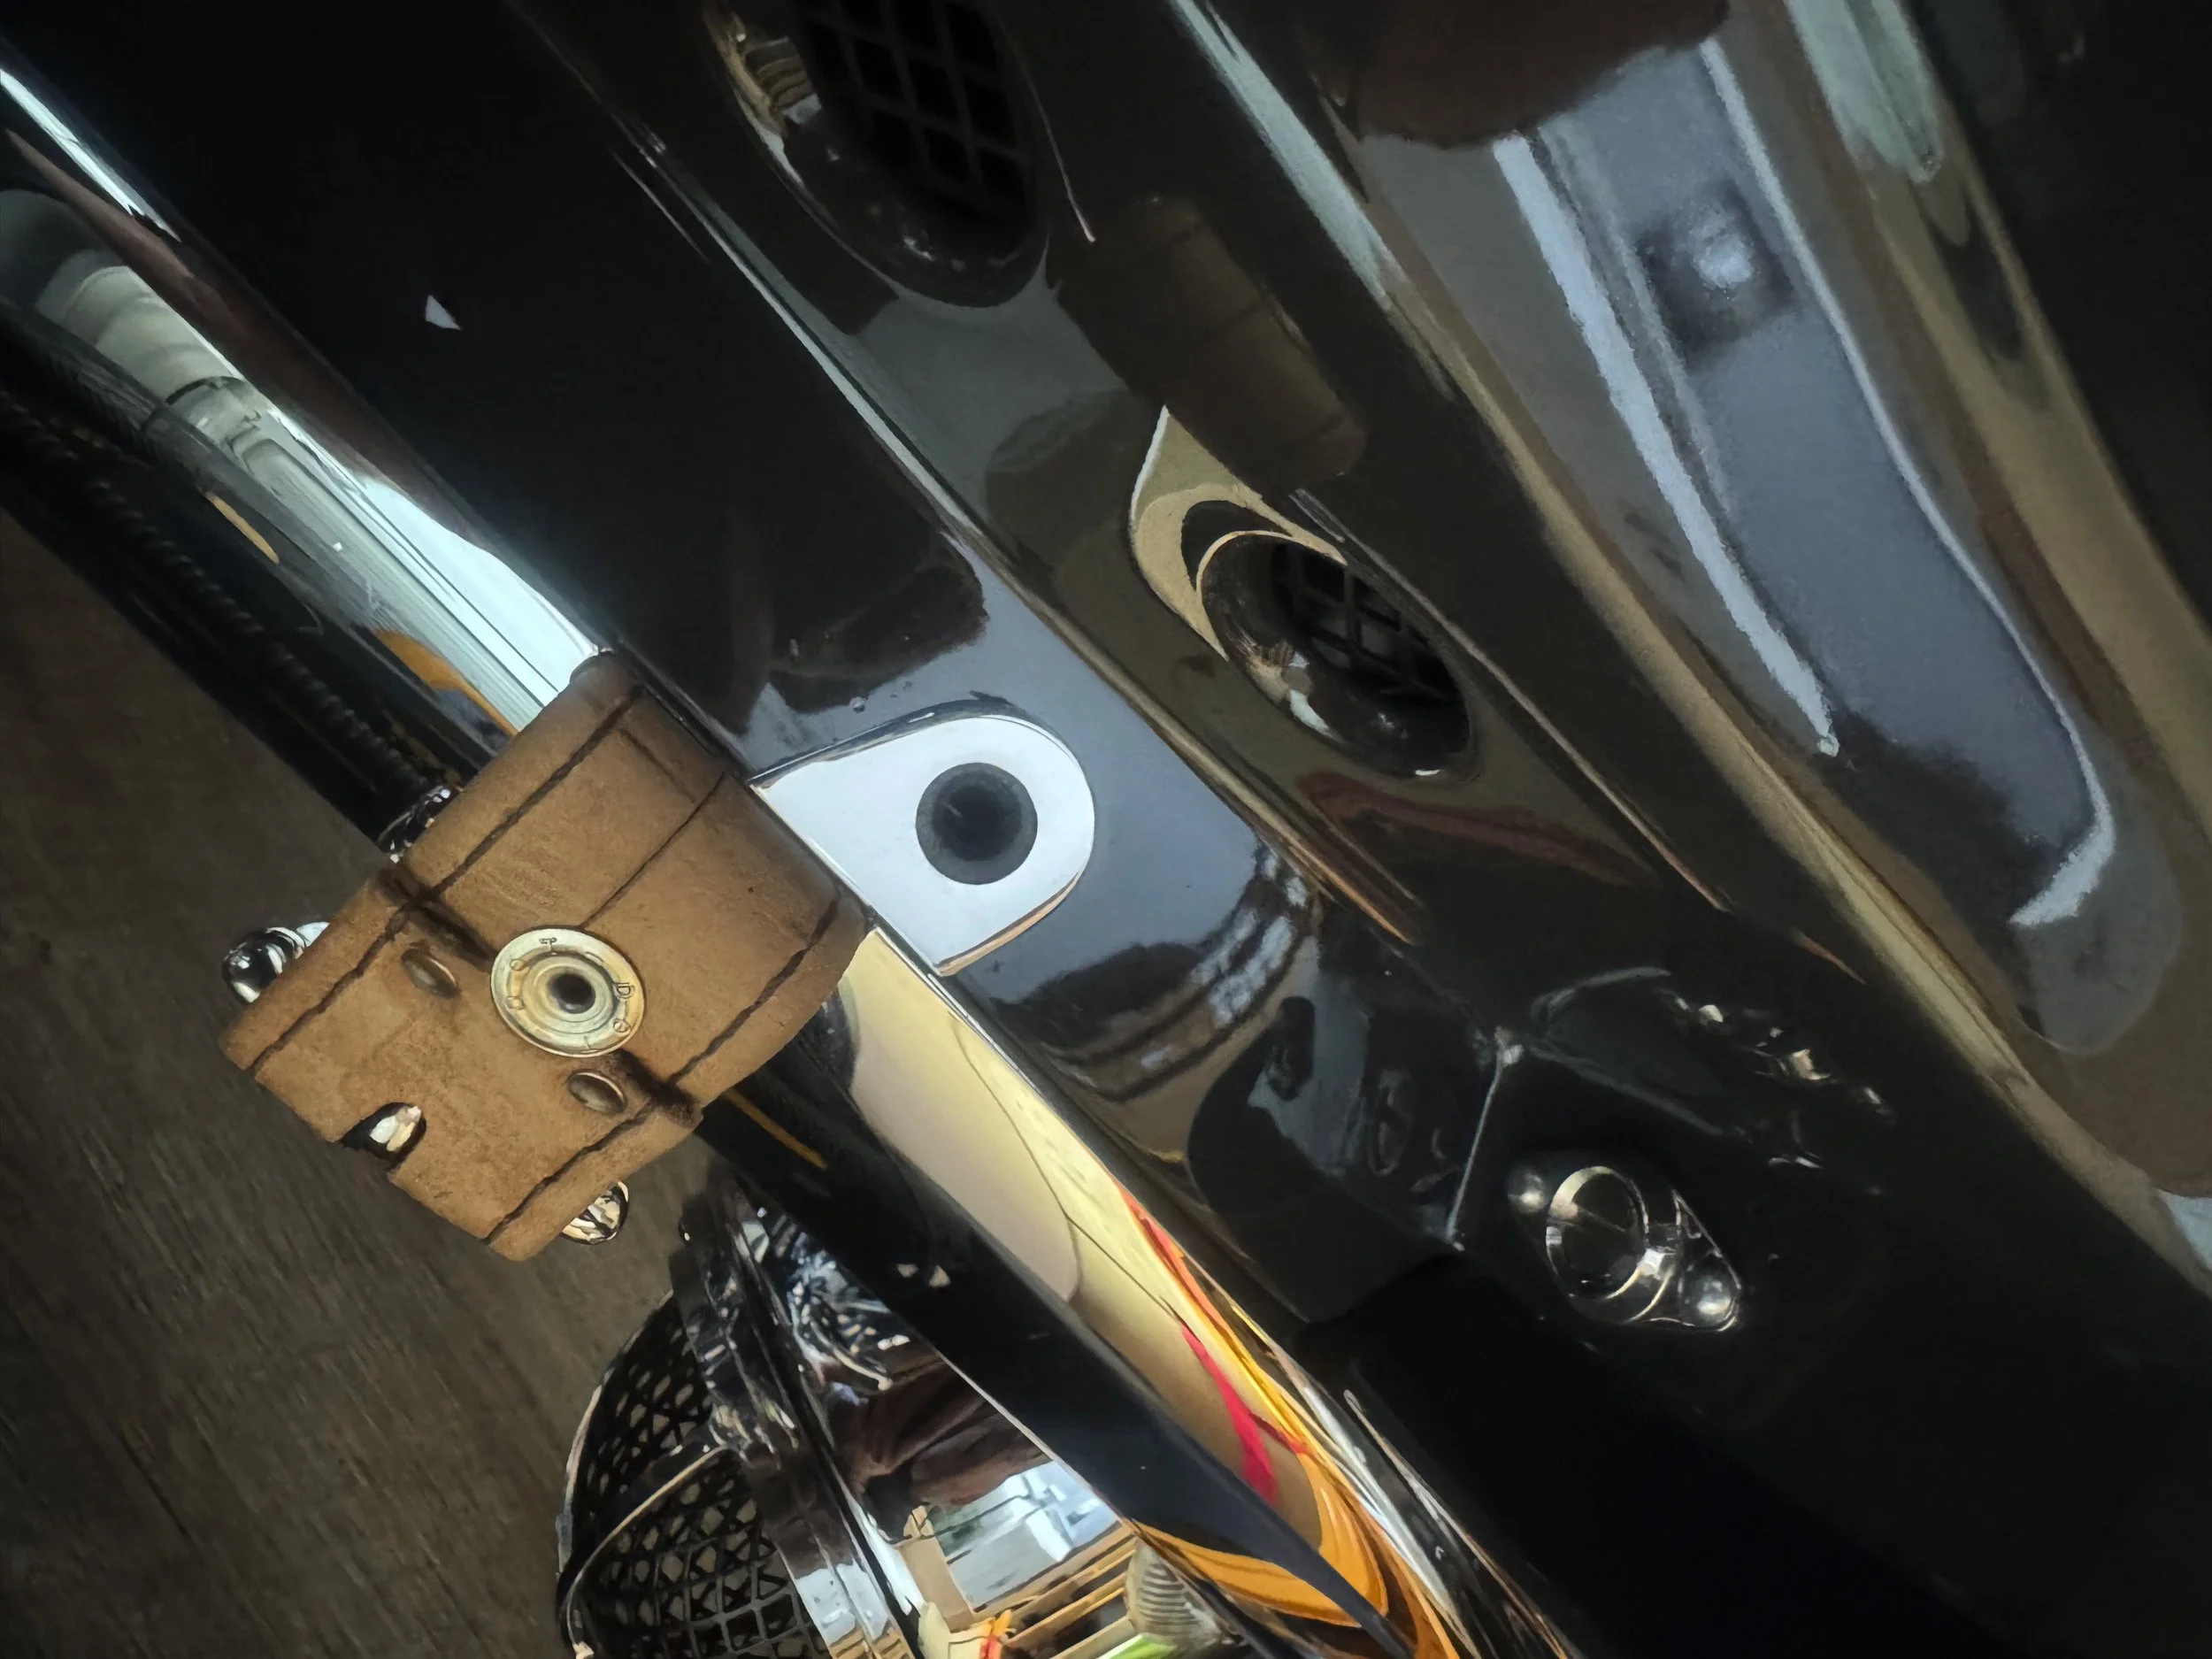
There are three hydraulic fluid lines from the reservoirs in the engine compartment, through the firewall behind the pedal box, then down into the three master cylinders. During my attempt to replace these in a hurry, I chipped up the paint around where they exit through the floorboard. I temporarily put rubber grommets in place to hide the damage during car shows but wanted something better. Craig came up with the idea to machine small polished bezels that make it look much more finished.
The hood has small locating pins that fit into holes above the grille. When opening and closing the hood, the pins would scrape the paint protection film in that area. Wicked Fab designed and fabricated stainless steel scuff plates and installed them where the hood locating pins enter the holes. It cleans up the area nicely.
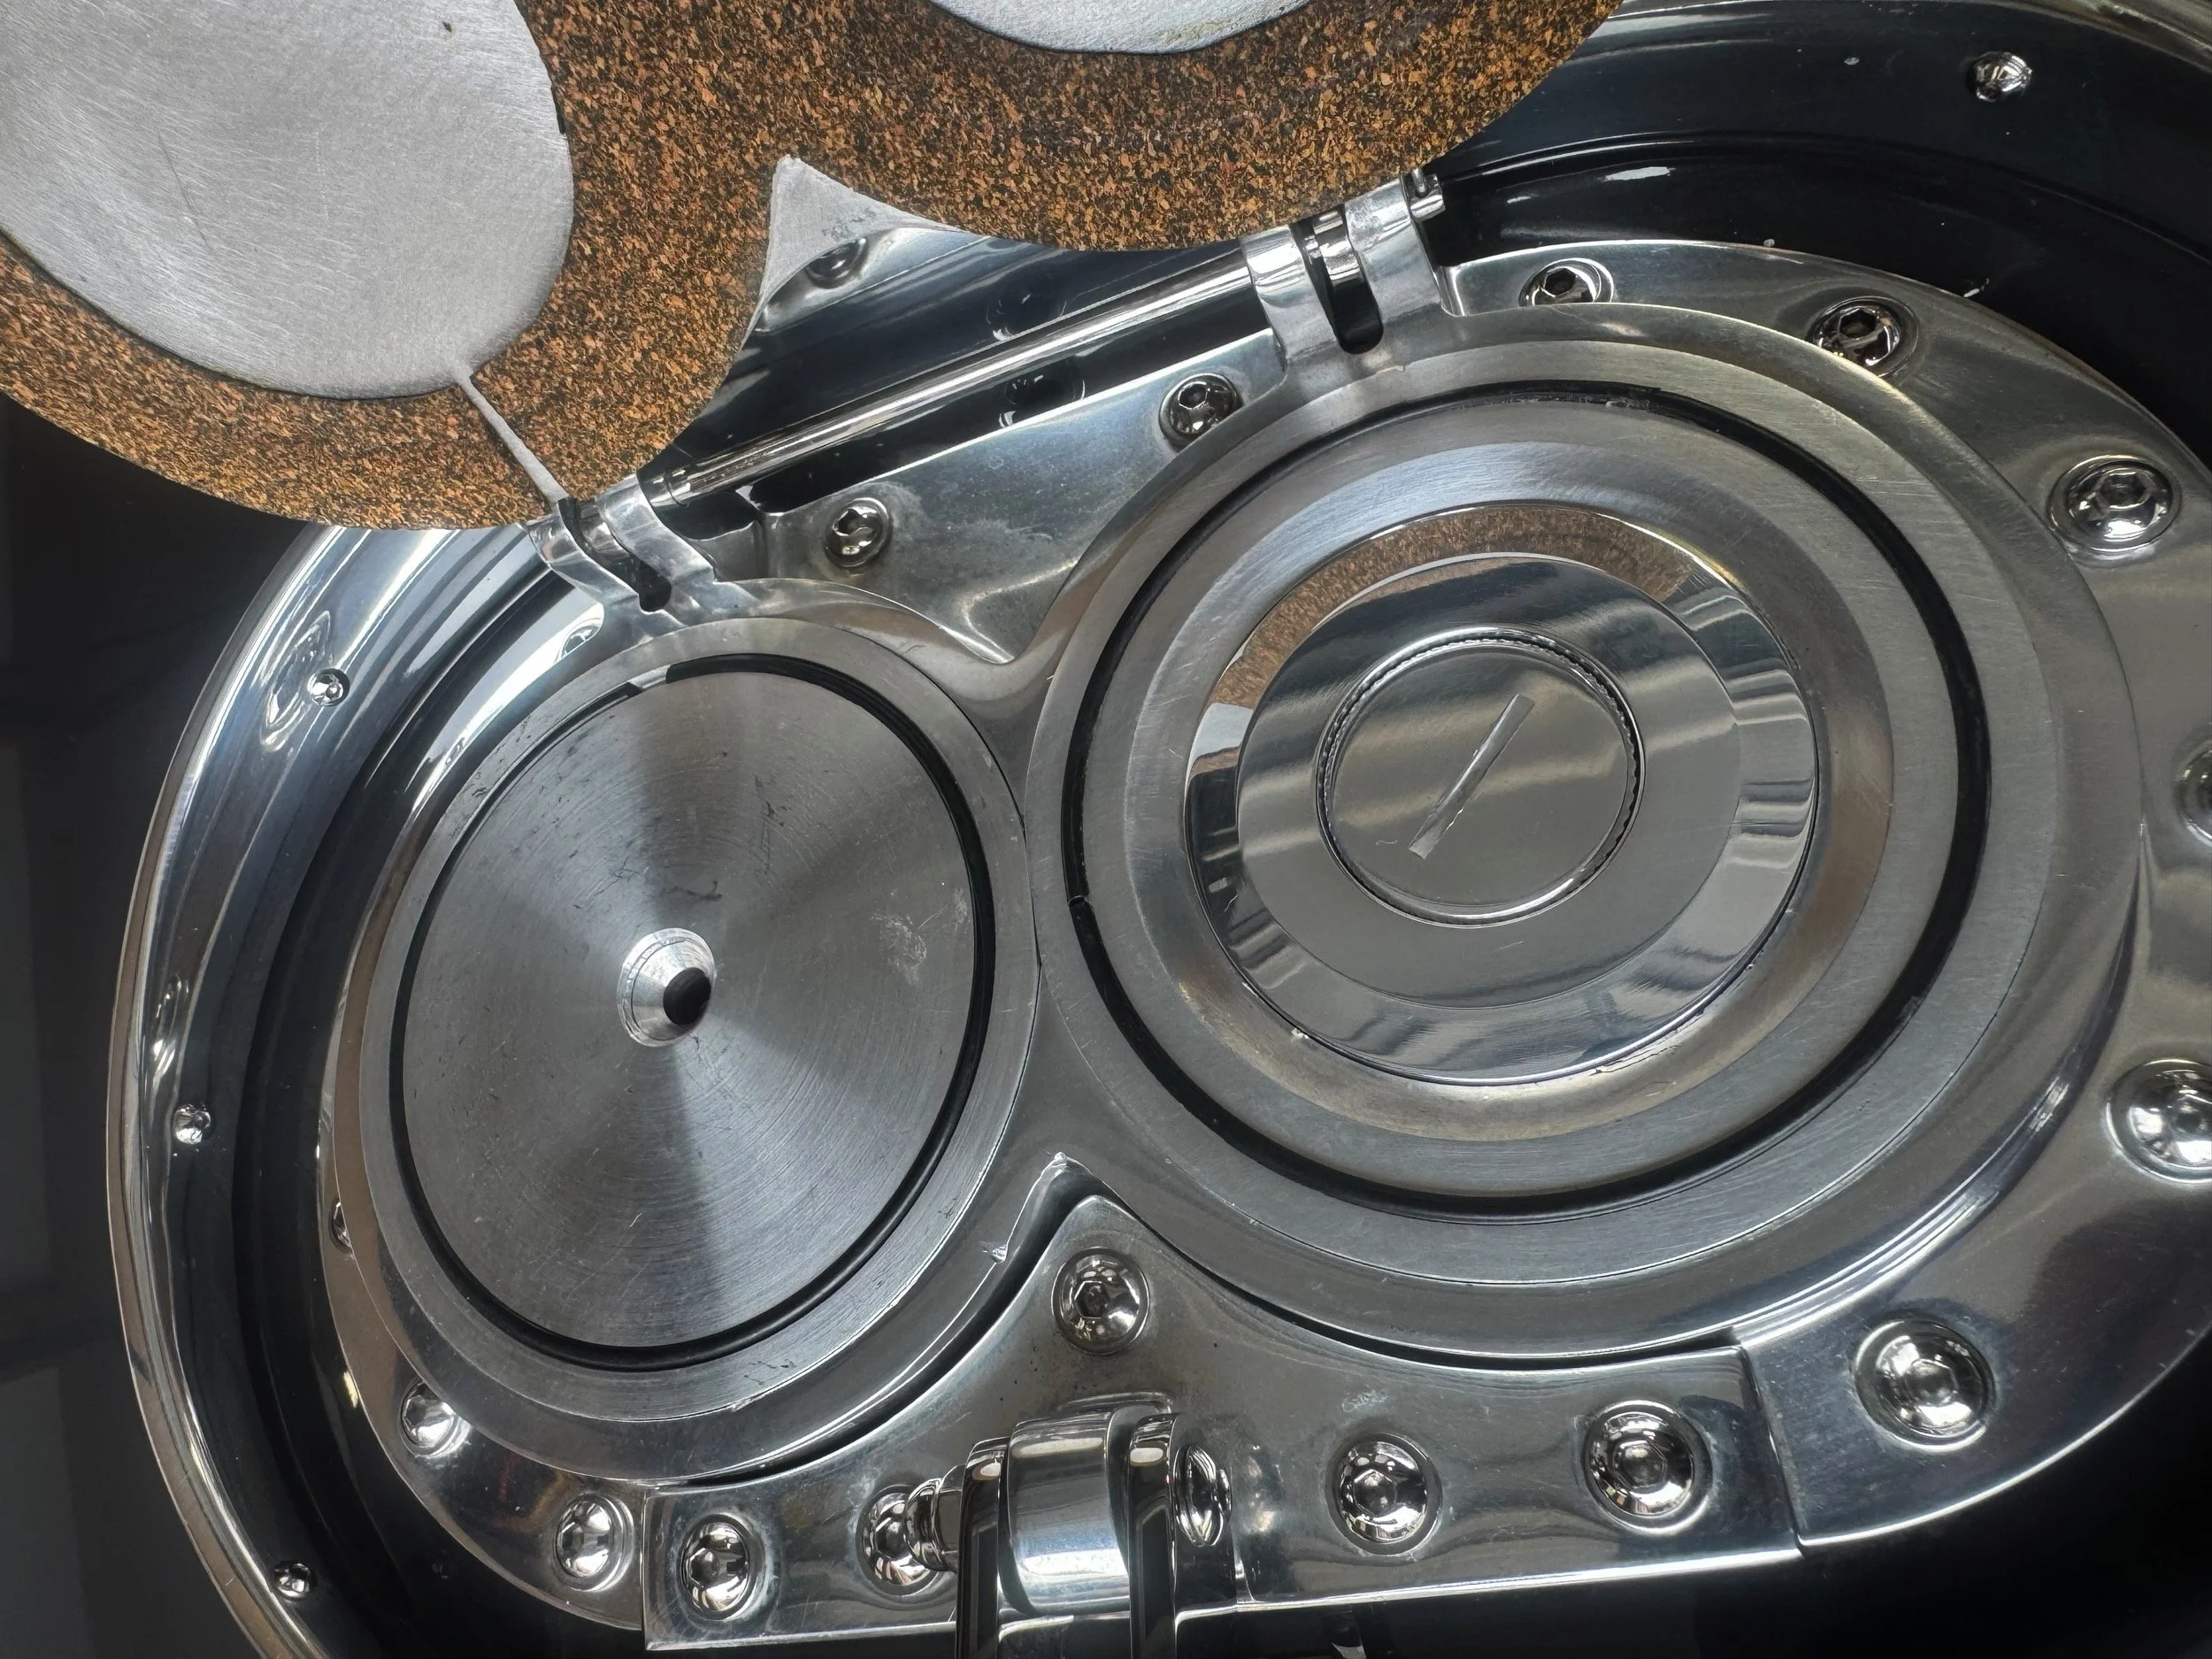
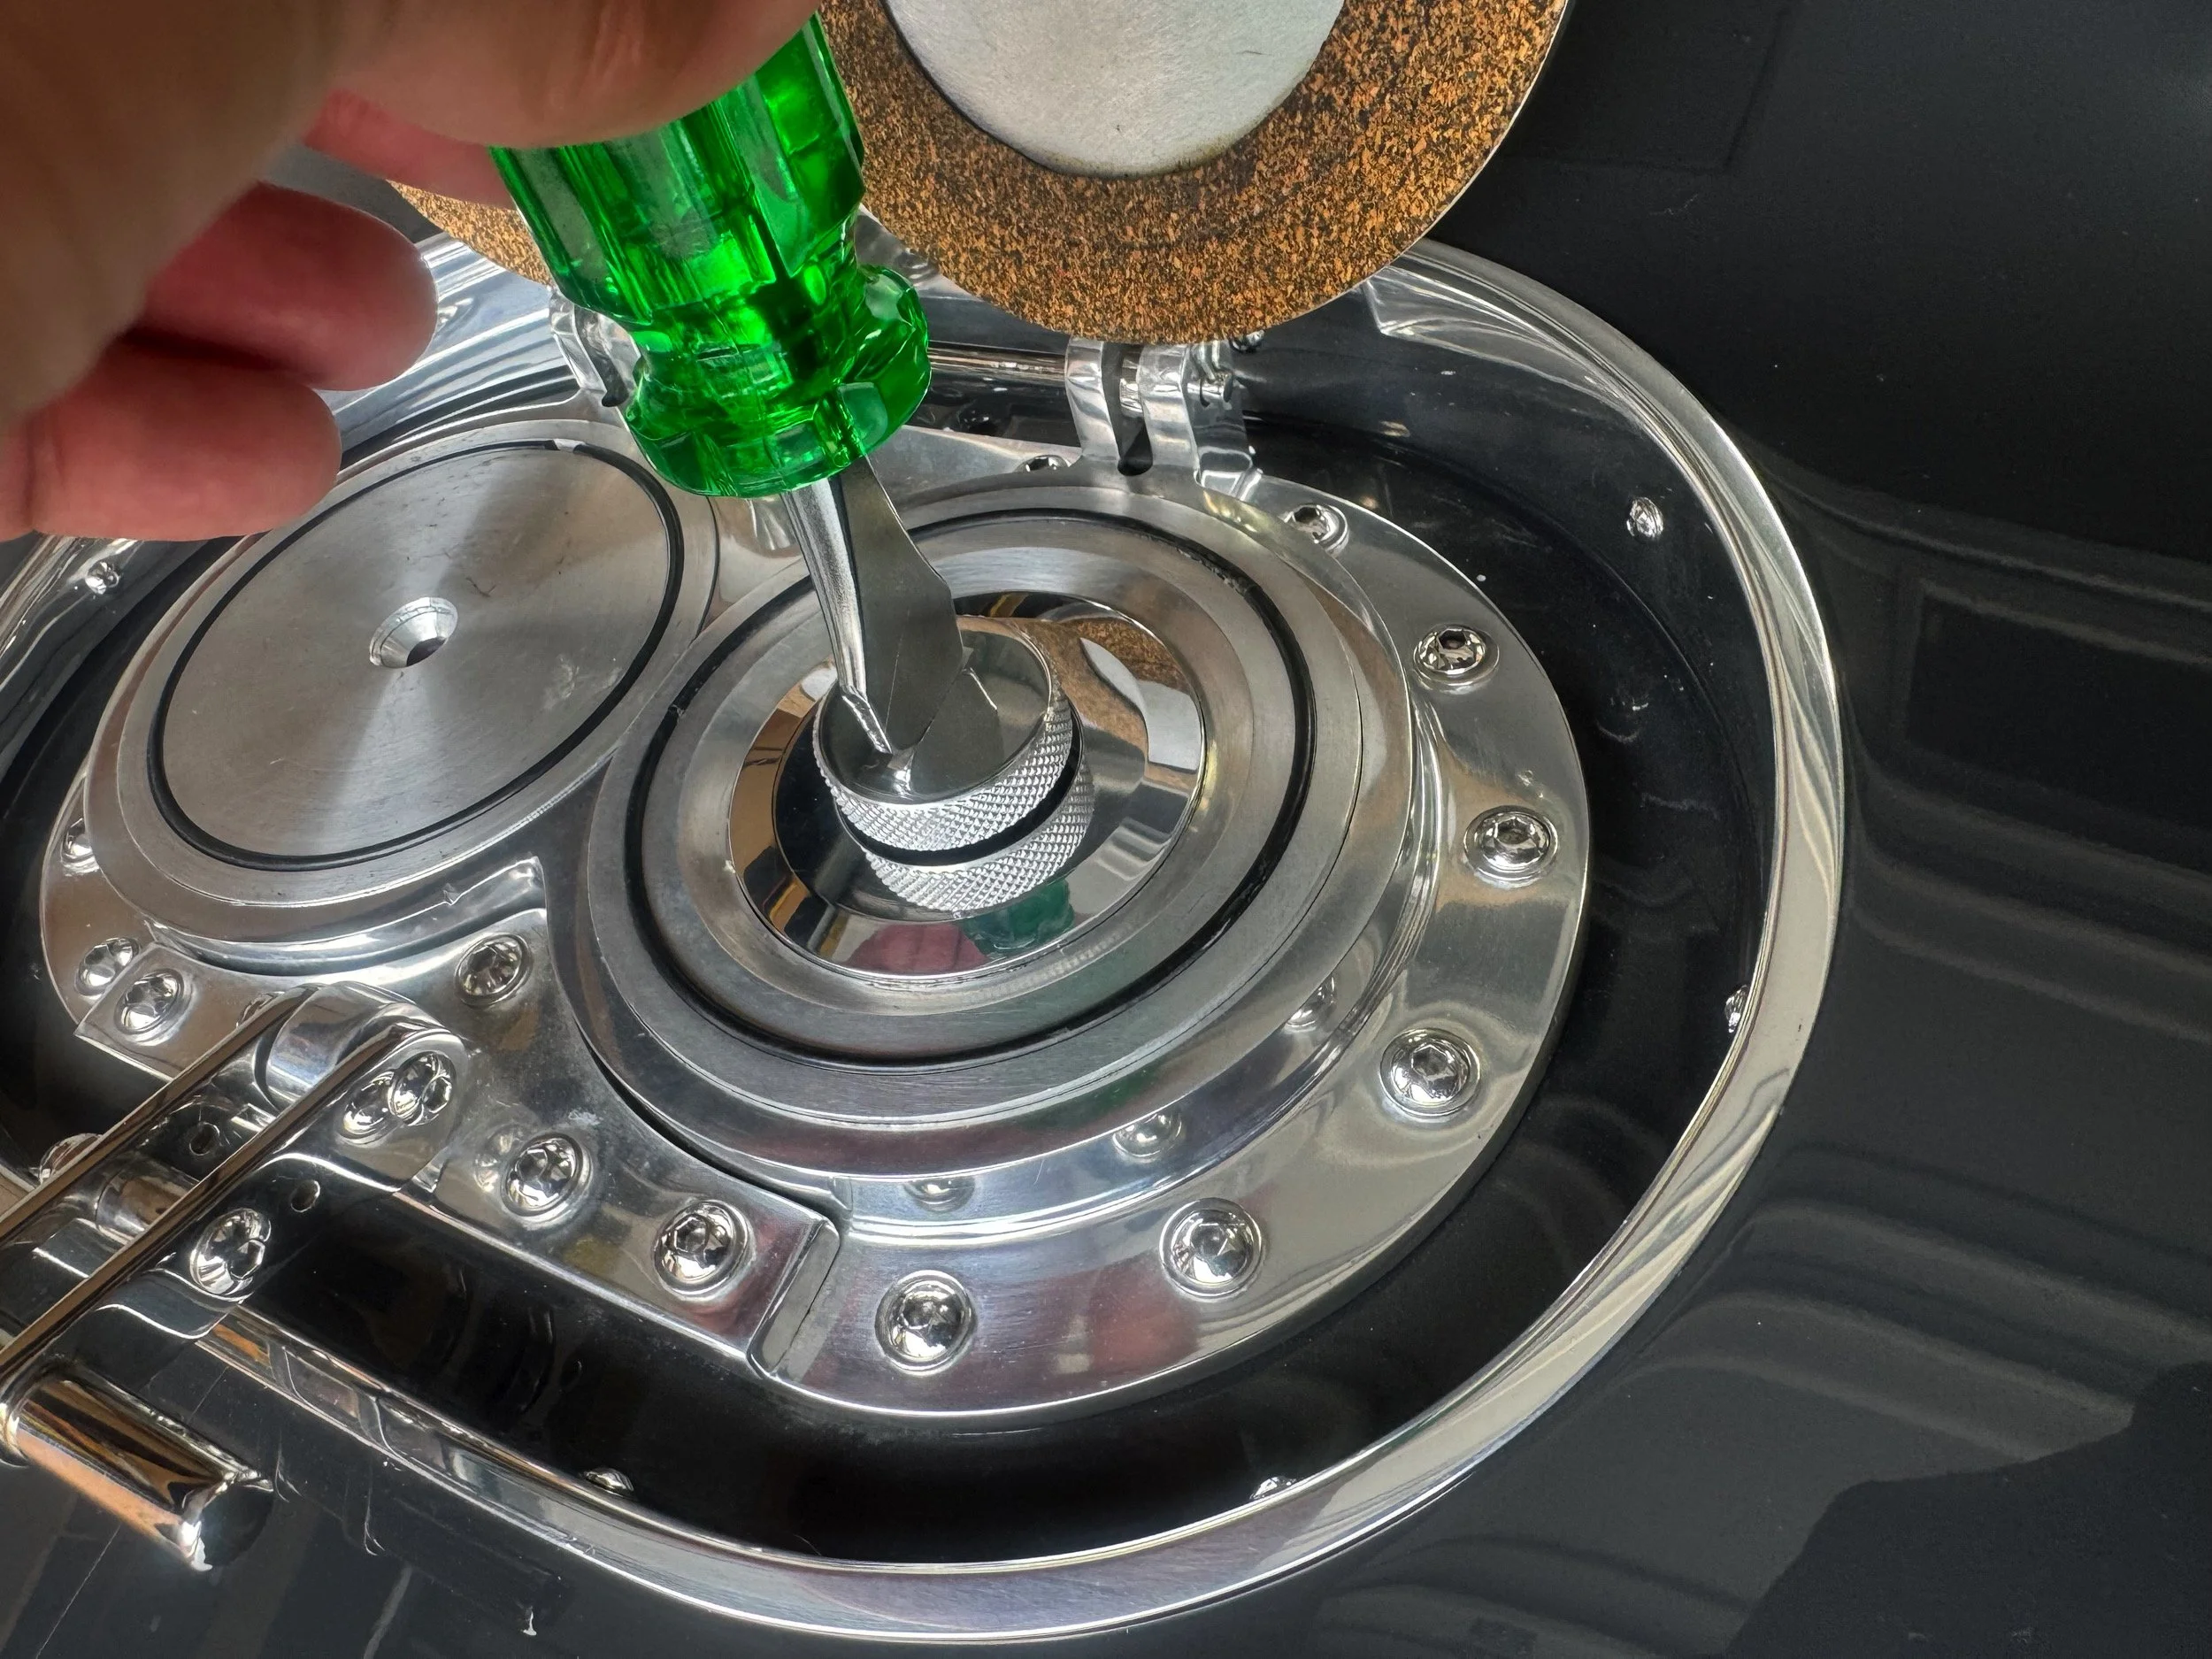
Another little issue I did not mention, but they fixed, was the new gas popup cap. When I installed the new gas tank, I installed a small cap that had a popup knob used to unscrew the cap. This cap is polished aluminum, and very slippery, so difficult to remove at the gas station. While the car was at Wicked Fab, they noticed this and milled a slot in the middle, making it look like a large Dzus style fastener. Now I can use a fastener tool to easily unscrew the cap and pop out the knob.
There seemed to be a leak in the front suspension air lift system as the front end would drop back down after a few minutes. Wicked Fab found a leaky Schrader valve at the bottom of the air tank inside the driver side front fender. Once that was replaced, the car was raised and left up for two days as a test.
The Vintage Air control knob for the AC cold temp on the roof panel could not fully turn. The team pulled the panel and readjusted the dial so that it can work properly.
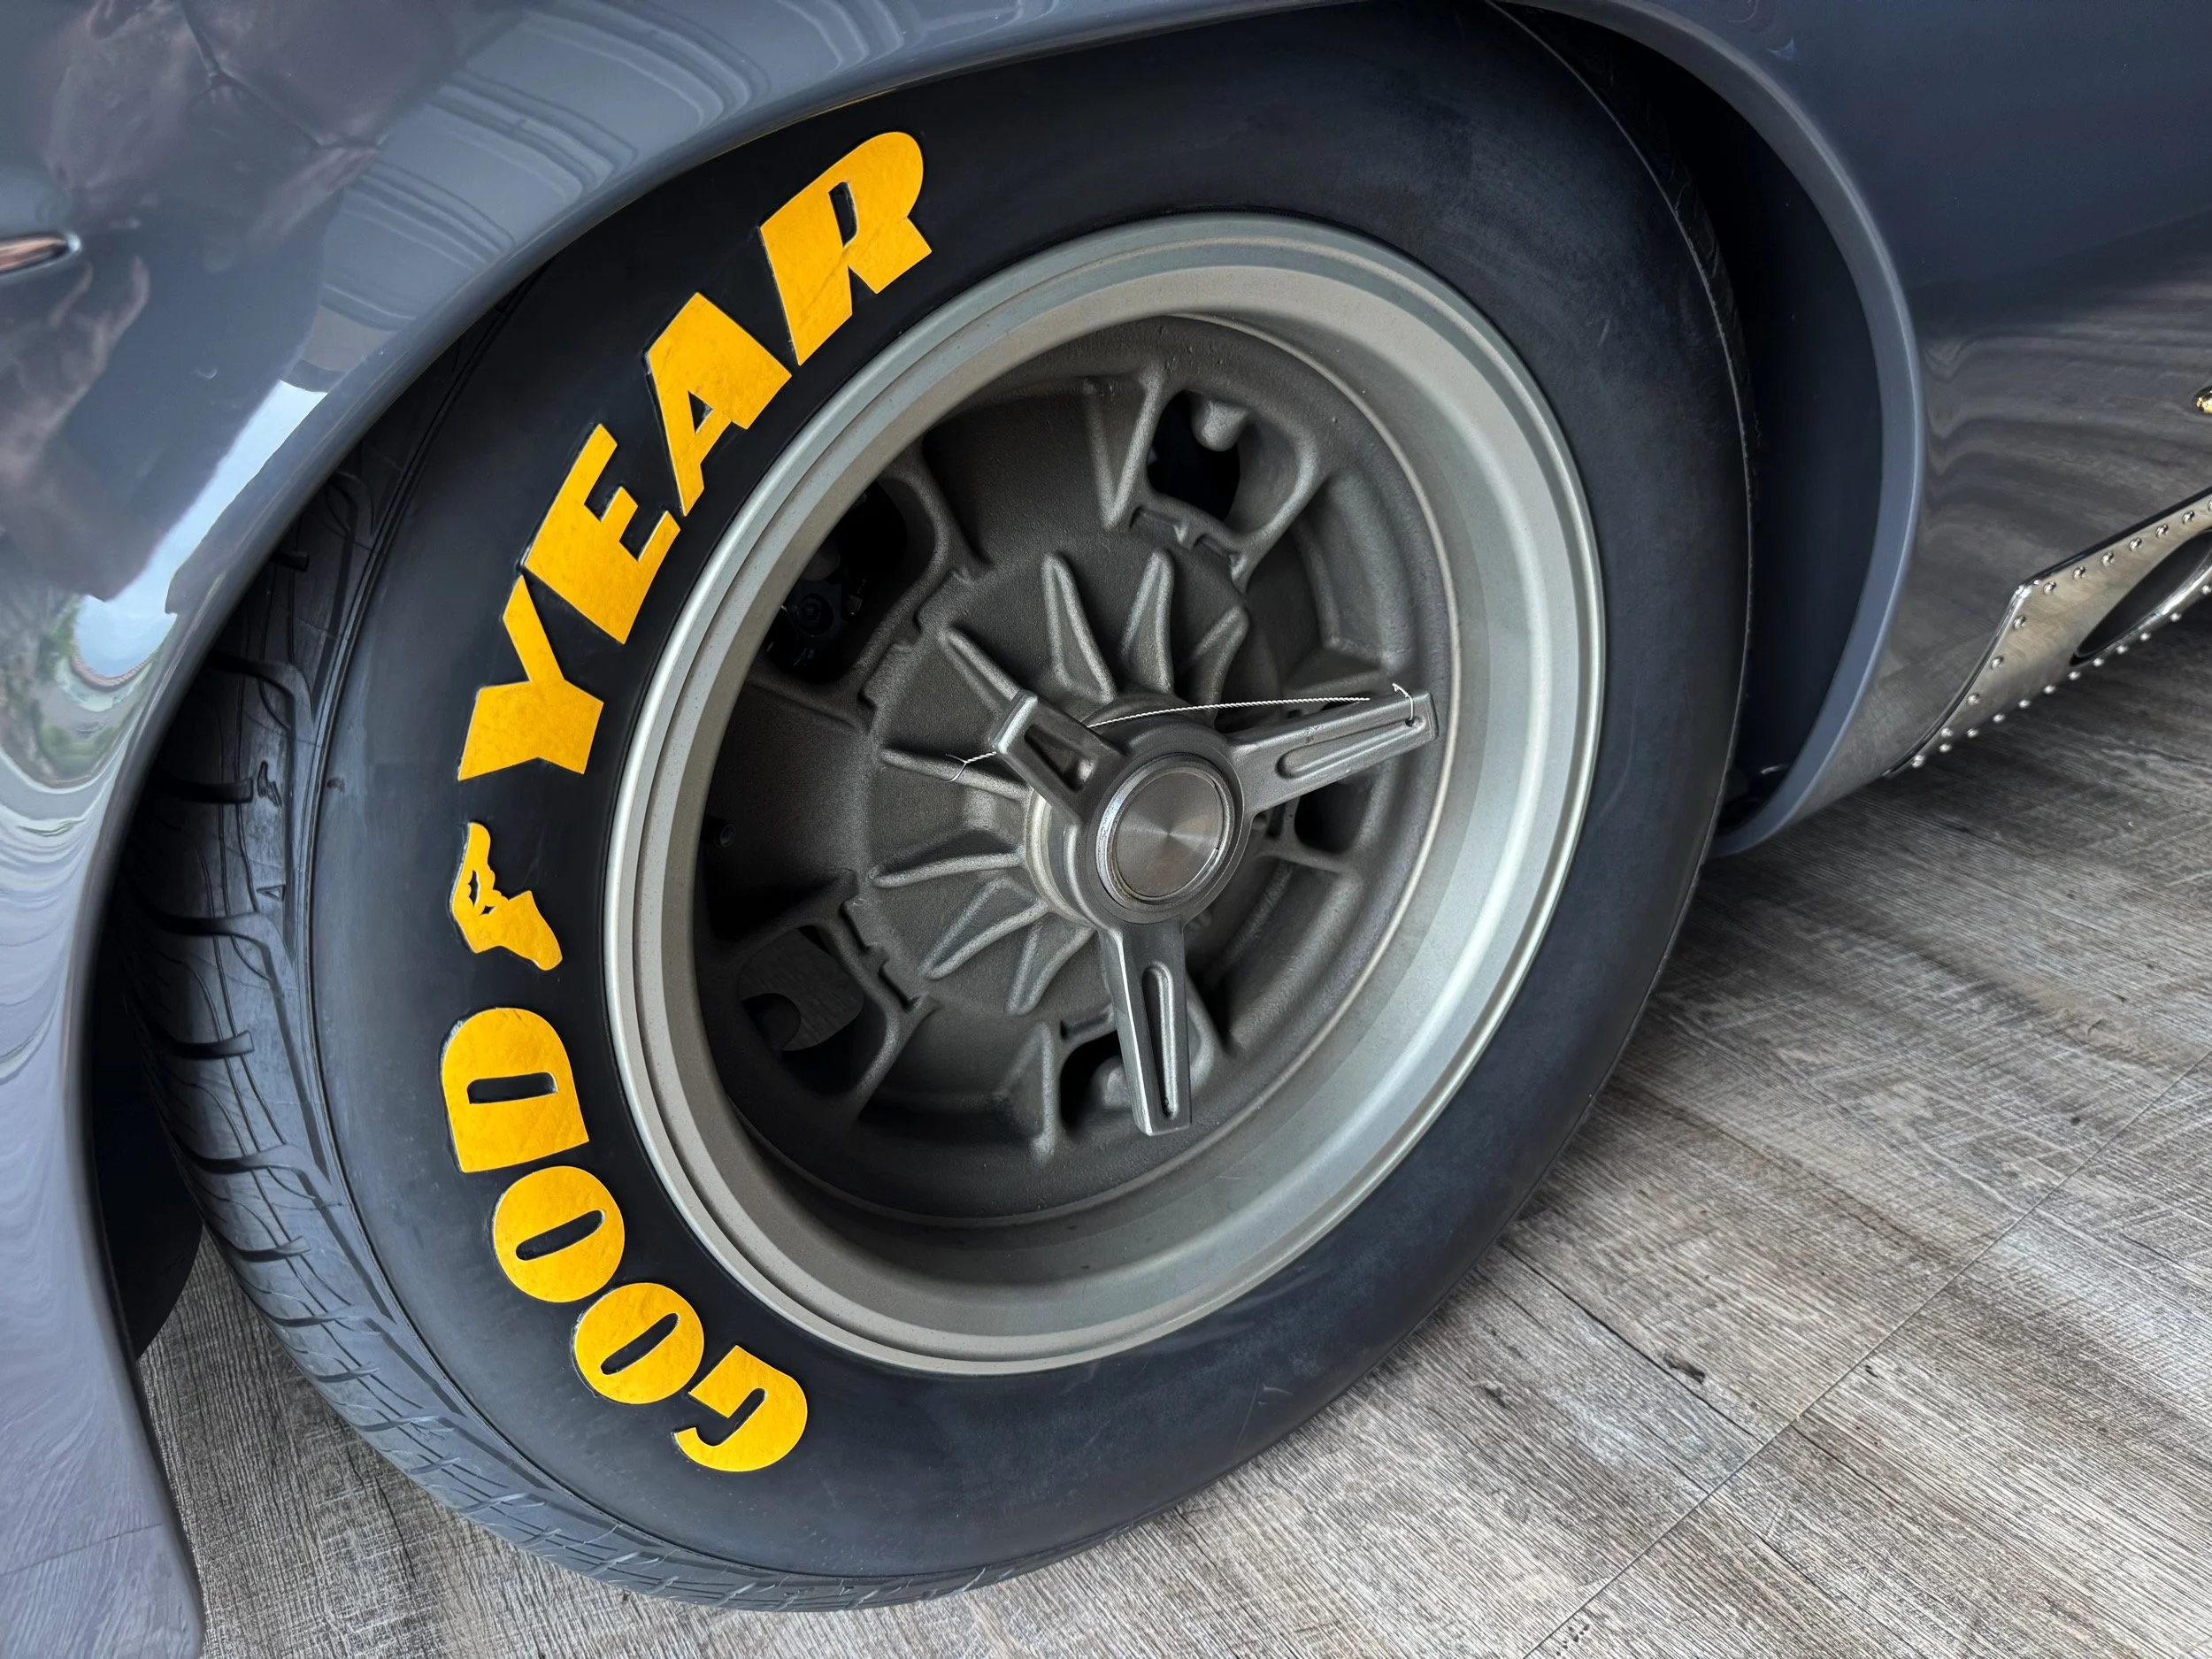
Since the tires were installed in 2016, I figured it was about time to replace them even though they were not worn. Craig and the team installed all five new tires along with the Good Year yellow lettering.
The radiator expansion tank overflow tube was loose, so the tank was removed, the tube was reattached, the tank was repolished, then reinstalled.
While there, since the car was running on its original engine oil for the first 1,200 miles, we decided to go ahead and change out the oil and filter.
Sometimes cold starts can be pretty rough and the engine can stumble. The Wicked Fab team used a flow meter to check the injector stacks and found two of them flowing much less than the other six. They corrected this with a linkage adjustment and now the car idles better when cold.